
Winter Hiking Guide
As the autumn hiking season starts to give way to winter it becomes important to adjust our equipment list to tackle the new challenges. Personally I love hiking in the winter and I am always happy to see more people give it a try because it can truly be a unique and fun experience. However, unlike warm weather hiking, the gear you choose can have a big impact on not only how enjoyable your trip will be but also your safety. I get asked fairly often about what kind of gear I use for all of my winter hikes and so I figured it might be helpful to write up a guide for people that may not know where to start.
I should start by saying that everything in the guide that follows is based on my own personal experience and opinions. There is no “right” and “wrong” way to prepare for a winter hike but there are still plenty of good practices and general rules of thumb. There are also countless gear options and combinations that can accomplish the exact same thing. Unfortunately since I am not independently wealthy I can only comment on what I have used personally and I find works. Lucky for you guys I do love gear though so I have tried a whole slew of different combinations before finding one that I love and have used for years. So you don’t need to think of this guide as a hard and fast gear list but instead as a list to guide you on what to look for when you are piecing together your own kit. If you have items you love to use personally please feel free to post them in the comments below for others to consider.
So with that out of the way we can begin going through my standard winter kit item by item and some general winter hiking advice!
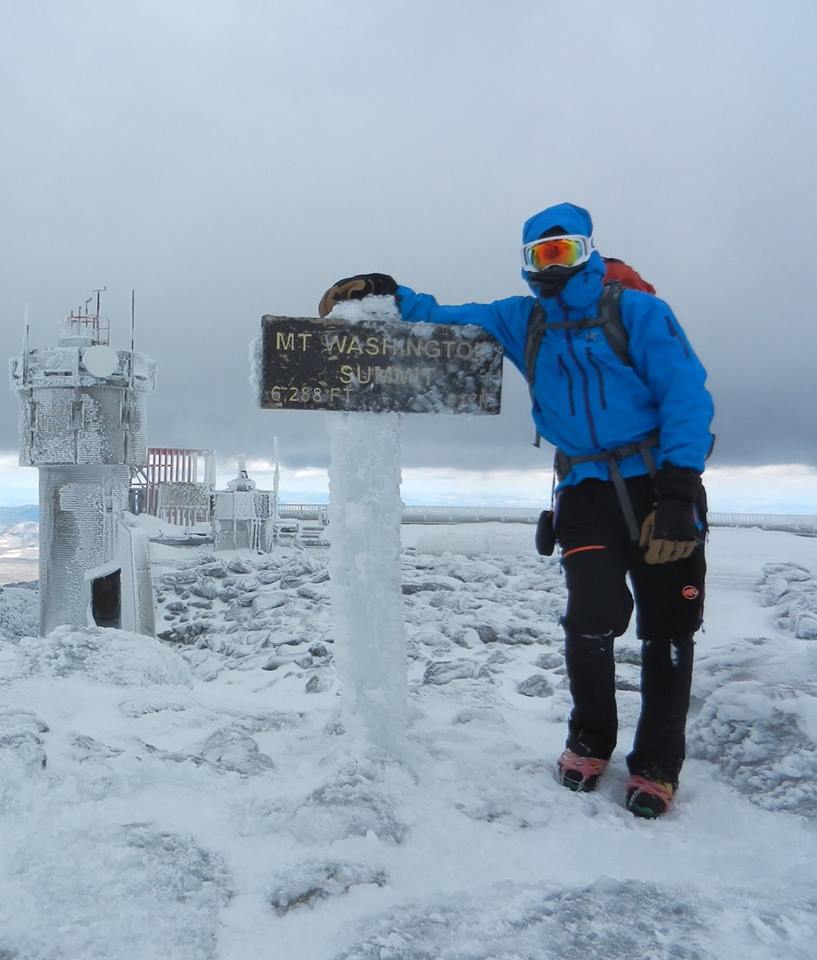
Holding on to the Mt. Washington summit sign in sustained 60+ Mph winds (February 2014). I had to be sure every inch of skin was covered to avoid less than fun wind burn!
General Winter Hiking Advice:
In general winter hiking is not that different than hiking any other item of year. The main difference is that the margin for error is slimmer and therefore all the planning you do ahead of time pays even bigger dividends. It is vital that you plan your hike ahead of time which means studying maps and your intended route, checking weather reports, and checking your pack to make sure you have all of your equipment before you even leave the house. Winter weather can be very unpredictable and you want to make sure you are ready for anything. If you sprain your ankle and become immobile during a summer time hike it might mean waiting around for a few hours swatting away black flies but becoming immobile during the winter could mean sitting on an exposed ridge in deep snow trying not to suffer hypothermia. This may sound like an excessive example and maybe it is, but its a real possibility and it’s important you go into your hike ready to deal with it.
Hydrate, hydrate, hydrate! You may think that just because its cold you don’t need to drink very much but the reality is you will sweat just as much if not more in winter. You want to make sure you are constantly drinking and staying hydrated. Dehydration can cripple you in any season!
Layers….It’s all about layering your clothing. You will go from hot to cold constantly so you want to make sure whatever you wear can easily be taken on and off to accommodate how your feeling. Being too hot can be worse than being a little cold because you will “sweat out” and end up dehydrating yourself very quickly. My rule of thumb is that you want to be a little uncomfortable in the parking lot before you start hiking. If you are warm and cozy in the parking lot you will be overheating before you hike your first mile.
Days are shorter in winter so keep in mind that hiking in or out in the dark might be necessary (Don’t forget that headlamp!). The snow and ice will also likely make you hike slower so account for extra time in your pre-hike planning.
My Usual Kit:
Boots:
The most important item in winter hiking, and even regular hiking in my opinion are your boots. If your feet aren’t warm, dry, and comfortable you will have a terrible time no matter what else you carry on your hike. That is why I have a few different boots which I bring depending on the time of year and the kind of conditions I expect to encounter. Good winter boots can be pricey but this isn’t an item you really want to skimp on.
- La Sportiva Trango S Evo – A semi stiff mountaineering boot that is waterproof and rugged. My choice for hiking in deep snow and long days. Also use them if I think I may need to put on actual crampons. This is my first choice for deep winter hiking.
- Salewa Alp Trainer Mid GTX – A good light weight hiking boot. Great for most conditions, but not my favorite for deep snow. I prefer using this boot for the shoulder seasons when you get an equal mix of snow, mud, and water.
- La Sportiva Nepal Evo – My go to boot for technical ice climbing and serious days in the mountains. The boots are very stiff and fairly heavy but they will get you up anything from Mt Marcy to Mt Rainier.
As a note, the boots I use are not heavily insulated and therefore may not be suitable for some people. Especially if you tend to have cold feet. If you tend to have cold feet, or if you plan on spending a couple of nights out in cold weather, you may want to consider a warmer double boot. Double boots have a hard or soft shell with a removable liner which can be easily dried overnight. This style of boot is also considerably warmer than the ones I have mentioned above.
Gaiters:
Gaiters keep snow and mud out of your boots and the bottoms of your pants dry. They are a key part of any winter hiking kit.
- Outdoor Research – Crocodiles – The only pair of gaiters I use. They are as tough as they come and perform perfectly in every way I can think of.
Socks:
I own about a million different kinds of socks so I won’t list any specific ones but there are just a couple of tips I have. You want to make sure that whatever socks you pick are either wool or synthetic, NO COTTON!! I tend to like sticking with socks from Smart Wool which are designed for skiing. They tend to be a bit slimmer and not so bulky that they cut off circulation or over heat your feet in already warm boots. Everyone’s feet are different so you need to decide if you generally have cold and or warm feet and choose accordingly.
I normally carry an extra pair in my pack just in case. In a pinch they can also work as emergency gloves.
Under-layers:
I tend to go with light weight long underwear bottoms and that is it. Anything more and I feel I run just way too warm. Plus my legs just never get that cold so it works for me. You need to use your own discretion on this one.
Base Layer:
As a base/mid layer on top I use only one item which is also the best item I have ever purchased for winter activities:
- Patagonia R1 Hoody – The best single item I have ever bought for outdoor winter activities. This item works as a warm base layer and can also be worn by itself and unzipped if you get warm. The hood also works as a perfect head/ear cover so I do not need to carry another separate hat. I can’t say enough good things about this item. It may be a little pricey but it is worth every last penny. For maximum efficiency you want to make sure that the hoody fits close to the skin. It may not be a style you love but that is how it keeps you warm!
Pants:
When it comes to my pants I tend to choose soft shell pants designed for mountaineering. I find that they are lighter and suit my faster style. I like to have pants I can move in quickly and that aren’t bulky or overly hot. Ski and snowboard pants tend to be a bit too heavy and bulky for my taste.
- Patagonia Alpine Guide Pant – Soft Shell pants that are water proof and tough. These have served me great in all sorts of conditions.
- Mammut Nordwand Pro – Another soft shell pant I love. Water proof and tough. Great for hiking and climbing.
In addition to my main pants I also carry a pair of hard shell pants for emergencies and particularly bad conditions. These pants have a full length zipper on the sides so you can take them on and off without having to remove anything else.
- Arc’teryx Beta SV Pants – My hard shell pants of choice. Solid and waterproof for particularly wet or miserable weather.
Jackets:
When it comes to jackets I have gone through many but have narrowed it down to three jackets I always carry and stand by. Again I like to go with items that are warm and light at the same time.
- Patagonia Nano Air – My favorite soft shell jacket to date. It is super light but still super warm. This is the main jacket I wear in the mountains and when paired with the R1 hoody I feel like I am always running at the perfect temperature. I recommend getting the hooded version because with the R1 hood and Nano Air hood on I find zero reason to carry any other hat.
- Arc’teryx Alpha Sv Hardshell – This jacket is the M1 tank of hard shell jackets. This thing is as rugged as they come and can withstand everything. I have experienced basically every form of miserable weather from 15 hours of monsoon rain through 100 mph wind gusts and it just brushes it all off. Even after going on 5 years of regular use it is in near pristine shape and has not even sprung a single leak. This thing is super pricey but it really is that fantastic.
- Mountain Hardwear Kelvinator Down Jacket – I use this as my emergency down jacket. Normally it stays packed in a stuff sack in my backpack just in case I need it. It is good for hanging out on summits when you aren’t moving around to stay warm. It doesn’t weigh much and packs pretty small so you don’t even notice it in your pack but you will love having it when you need it.
- **It seems like this jacket is no longer available but a similar one would do the same job. I will update here soon when I have tested out a new alternative!**
Gloves:
Like socks, I have so many different gloves. Normally I go with a lightweight “glove liner” for most of the day plus a hard shell glove which can be worn over the liners or by themselves as necessary. I also pack one pair of heavy gloves or mitts for when the weather gets extra bad or I will be sitting around for a while. You will have to experiment with what exactly works for you but I would recommend packing at least 2-3 pairs of gloves for any winter hike. One heavy pair and one light pair. Plus I will note that no matter what companies say, there is not one glove that is truly waterproof. They will all get wet eventually if you spend anytime in the snow so you want to make sure you an alternate pair. Wet gloves + cold weather = a one way trip to frostbite town. I have gotten minor frostbite once in my life because of a poor glove decision and it sucks. I wasn’t able to feel my finger tips for over a month, so really its not worth messing around with. Just pack an extra warm pair no matter what!
Hats:
As I mentioned above between the hoods on my R1 Hoody, Nano Air jacket, and every other jacket I carry, I just don’t have a real need for a hat in my personal setup. Personally I like having multiple items that fill this role because it just means I do not need to carry another separate item. However, if you don’t have multiple items filling this role I would just recommend going with a wool or synthetic hat that you find comfortable and warm. As with every other piece of gear, NO COTTON!
Traction Device:
One of the most important pieces of gear you will need for winter is some kind of traction device for your feet. Most of the time on heavily traveled trails you will be dealing with smooth ice and not snow so you want to make sure you can hike across it quickly and safely. There are only a couple of items I would recommend for this job.
- Kahtoola Microspikes – The gold standard of winter traction devices. Light weight and grippy in varied conditions. I don’t leave home without them.
- Hillsound Trail Crampon – Similar to the microspikes but with more aggressive spikes. They are better for steeper and thicker ice but can be a bit cumbersome on exposed rock. Overall I prefer the microspikes but some people prefer the added traction of the Hillsounds.
- Grivel G10 Crampons – A basic crampon designed for more serious ice or glacier travel. Not usually necessary for most winter hikes but can be very helpful if you expect to encounter steep terrain.
- Grivel G14 Crampons – My go to crampon for steep vertical ice climbing. However, they are way too aggressive for general hiking purposes and can quickly become uncomfortable. You need to pick the right tool for the right job. More does not always equal better!
Backpack:
Again there are a ton of options here so I will not list them all. I have several packs I use and generally just pick the smallest one that fits all my gear for that particular objective. A 30-45 pack should generally be more than sufficient for most day trips. Sometimes when you have too much space in your pack all you do is end up carrying more stuff than you actually need just because it fits. At the end of the day every pound you can save on your back is a blessing.
Trekking Poles:
Great for saving your knees and stability in windy weather. I would recommend buying the strongest and lightest ones you can afford with your budget. Collapsible ones are particularly handy.
Snowshoes:
Depending on where you are hiking snowshoes may or may not be required and or necessary. A good rule of thumb is if there is more than 6 inches of snow on the trail you will want to have them. They certainly make travel over deep snow easier and safer so in general they are great to carry and you can put them on as necessary. In some areas, especially on the west coast, you won’t be getting anywhere without skis or snowshoes!
The other stuff:
In addition to the basic gear I carry I also have the following stuff in my pack:
- Water – 2 one liter Nalgene bottles in Outdoor Research Insulators to prevent freezing. In my experience 2 liters has always been enough water for a full day in the mountains. The insulators are key for keeping your water unfrozen! Another good strategy is to keep your water bottles upside down so even if they do freeze it wont be at the drinking end.
- Food – You need to make sure your eating! I recommend keeping those cliff bars close to your body because they freeze quickly and it is better to avoid unnecessary dental work.
- Map – I always carry a map of where I am hiking. You never know when you might need to check where your headed or work out an alternate route.
- Headlamp – Hiking in the dark is just a part of winter hiking in general. This is one thing you don’t want to forget, especially in winter!
- Camera – For those Facebook worthy moments.
- Sun Glasses/ Goggles. – Sun reflecting off snow is incredibly bright. You want to make sure you protect your eyes from snow blindness, especially at high altitudes.
- Chapstick – I just feel naked without it. Also good for sun protection.
And….That is it.
I will admit I tend to carry a bit less than most people but that is mostly because I have spent too many years carrying stuff I never used before finally taking it out of my kit. There is a certain amount of trial and error that will go into creating your own perfect winter kit so I would recommend starting with more and then whittling it down over time until you reach your perfect balance. This guide will continue to be updated as time goes on and I try and upgrade various pieces of my kit. I will also expand the guide as I receive questions below and people bring up things I may have missed when originally writing this guide!
Happy winter hiking!
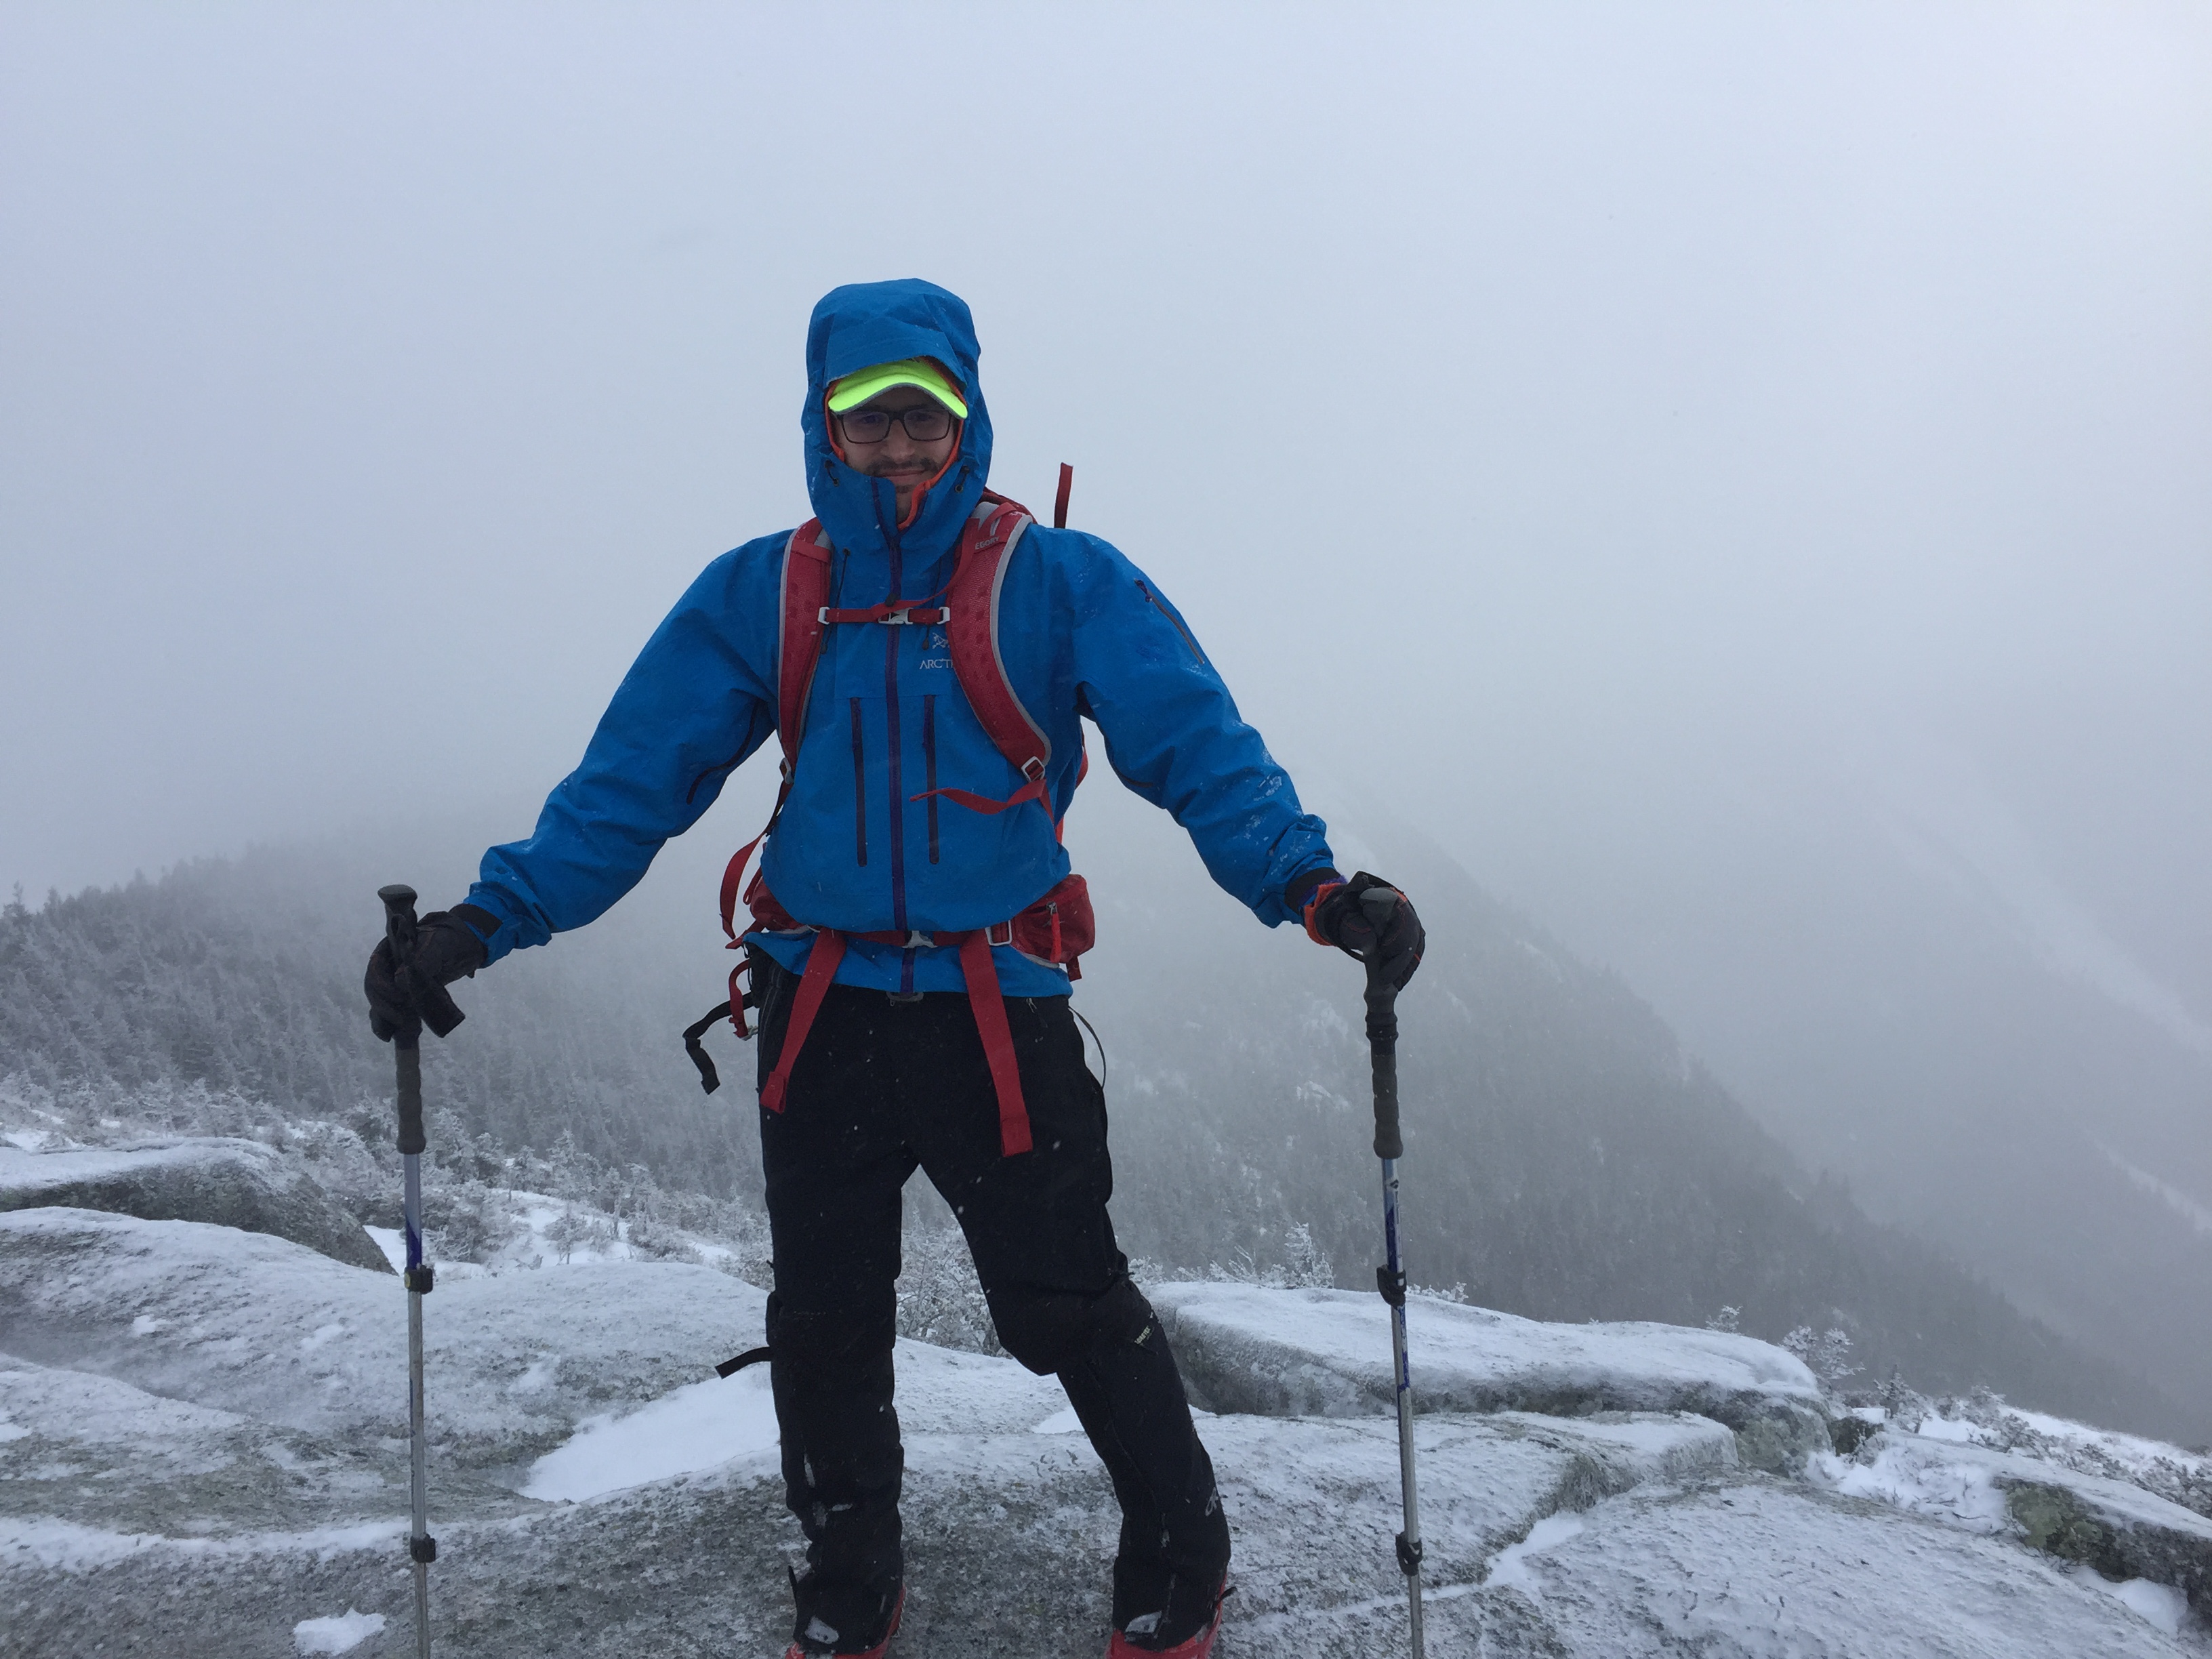
Enjoying a cold windy day on Gothics Mountain!
Categories: General


That’s a good list!
FYI … Outdoor Research Insulators was discontinued recently 😦
The Mountainsmith Insulated Bottle Holder is getting good reviews.
LikeLiked by 1 person
I will have to check them out! The OR ones were always hard enough to find even when they made them.
LikeLike