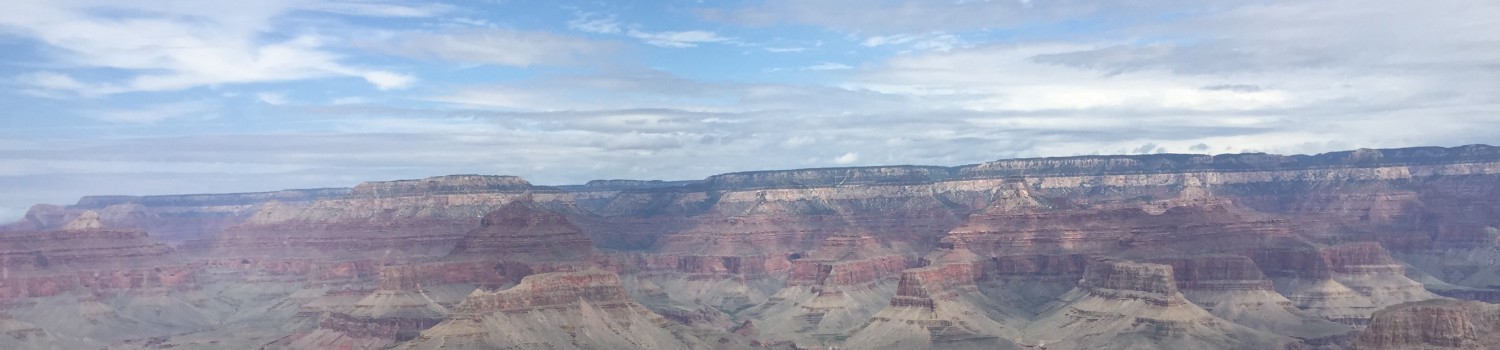
TRIP REPORT: Devils Garden Trail – Arches National Park , UT 1-17-16
We had arrived in Moab late on the 16th and after a deep sleep in the hotel woke up bright, early, and well rested for our day in Arches National Park. I have always heard that Arches is more of a “driving” park and that it is so crowded it can be a little less than fun to explore, so I didn’t really start the day expecting much. Luckily for us none of this turned out to be the case on our visit. However, I can appreciate why people could feel this way, especially if you were visiting the park during the busy season. Quite a few of the Arches and other landmarks are right off the road and there is plenty of beautiful scenery you can enjoy from the comfort of the road but I think by hitting the trail we were truly able to enjoy the park in a more special way.
We had decided to drive all the way to the end of the park road and hike the Devils Garden Trail. We figured on this hike we would have the best opportunity to see the most arches instead of doing just Delicate Arch by itself. When we got to the parking lot at the trailhead there were only a couple of other cars in the parking lot and we were happy to know we would have the trail mostly to ourselves.
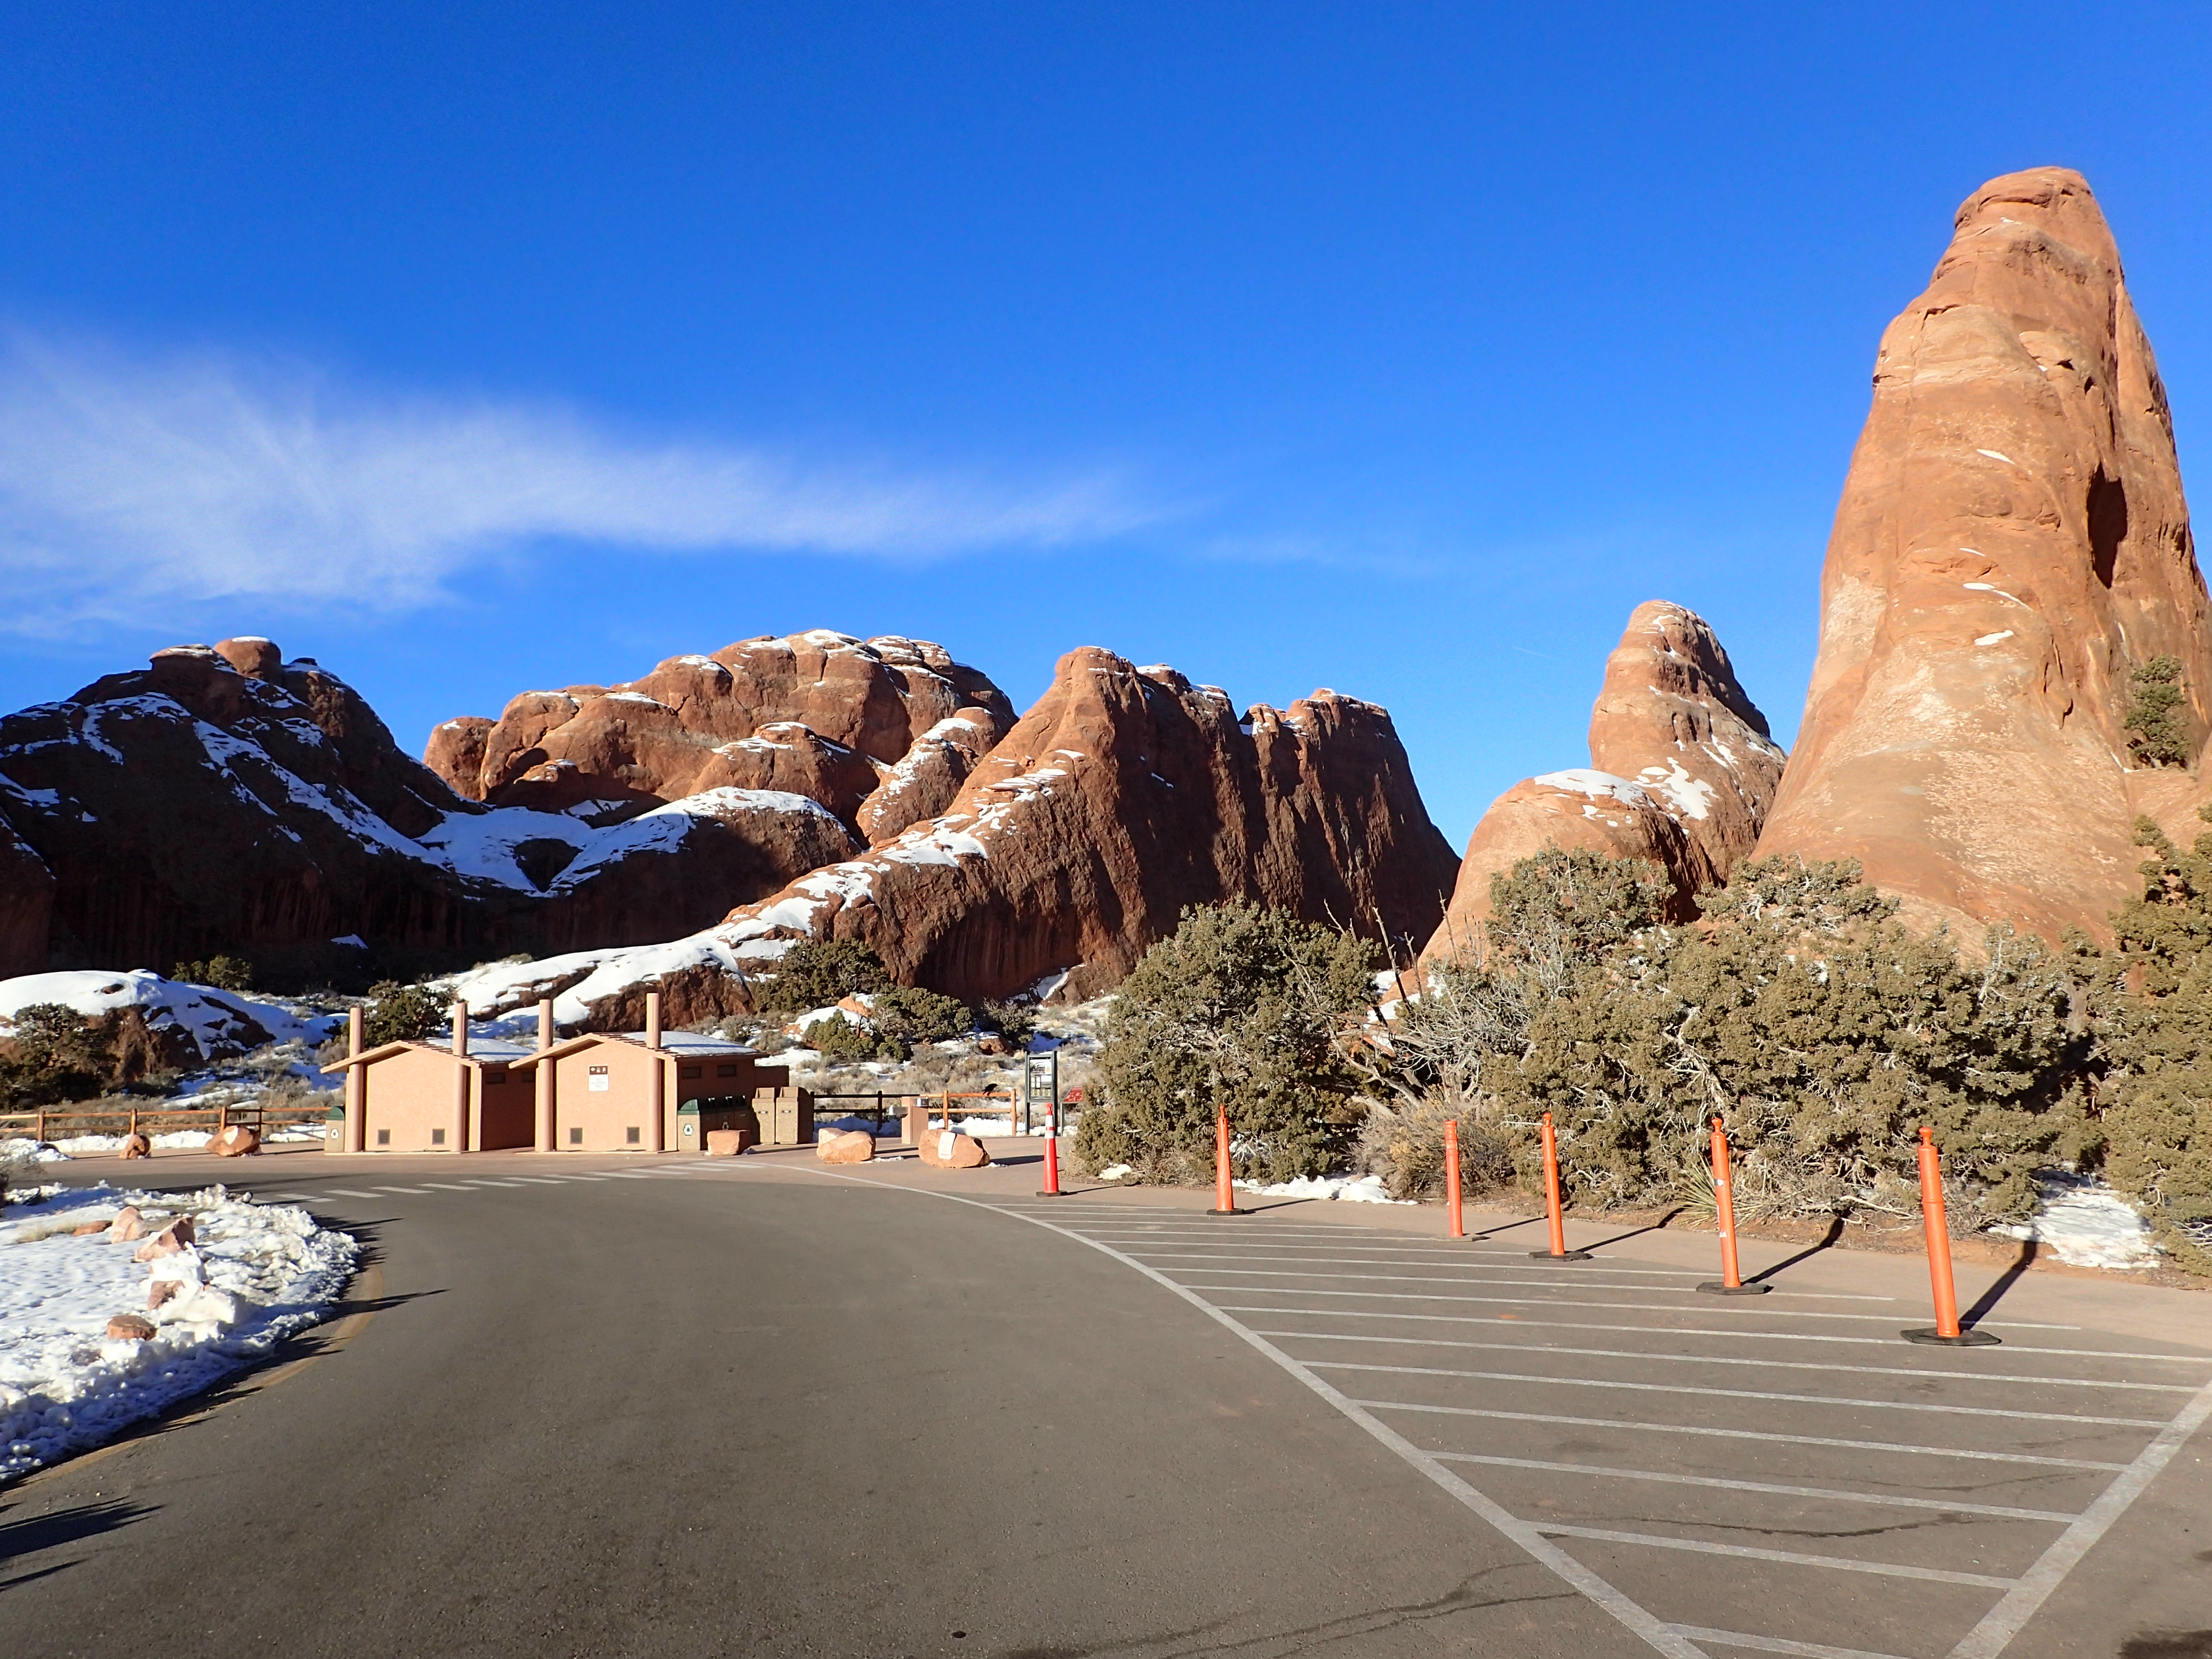
Devils Garden Trailhead
The start of the trail is well marked and is a well worn and wide path leading into the desert. The trail starts by leading you into a short canyon section before opening up beyond.

Start of the trail.
It was a bright and sunny day but the start of the trail sits in the shade so it was a bit icy between the tall cliff walls but this section was short so we didn’t bother putting on micro spikes.

Short canyon section at the start of the hike.
Once we passed the canyon section the trail opened up onto more open desert. After coming from Bryce Canyon the day before it was quite a change in scenery. Here there was much less snow and a much more vast and open space which offered magnificent views in every direction. The trail also only had a thing layer of soft snow which was easy to walk with just our bare boots.

Trail after passing the short canyon section.
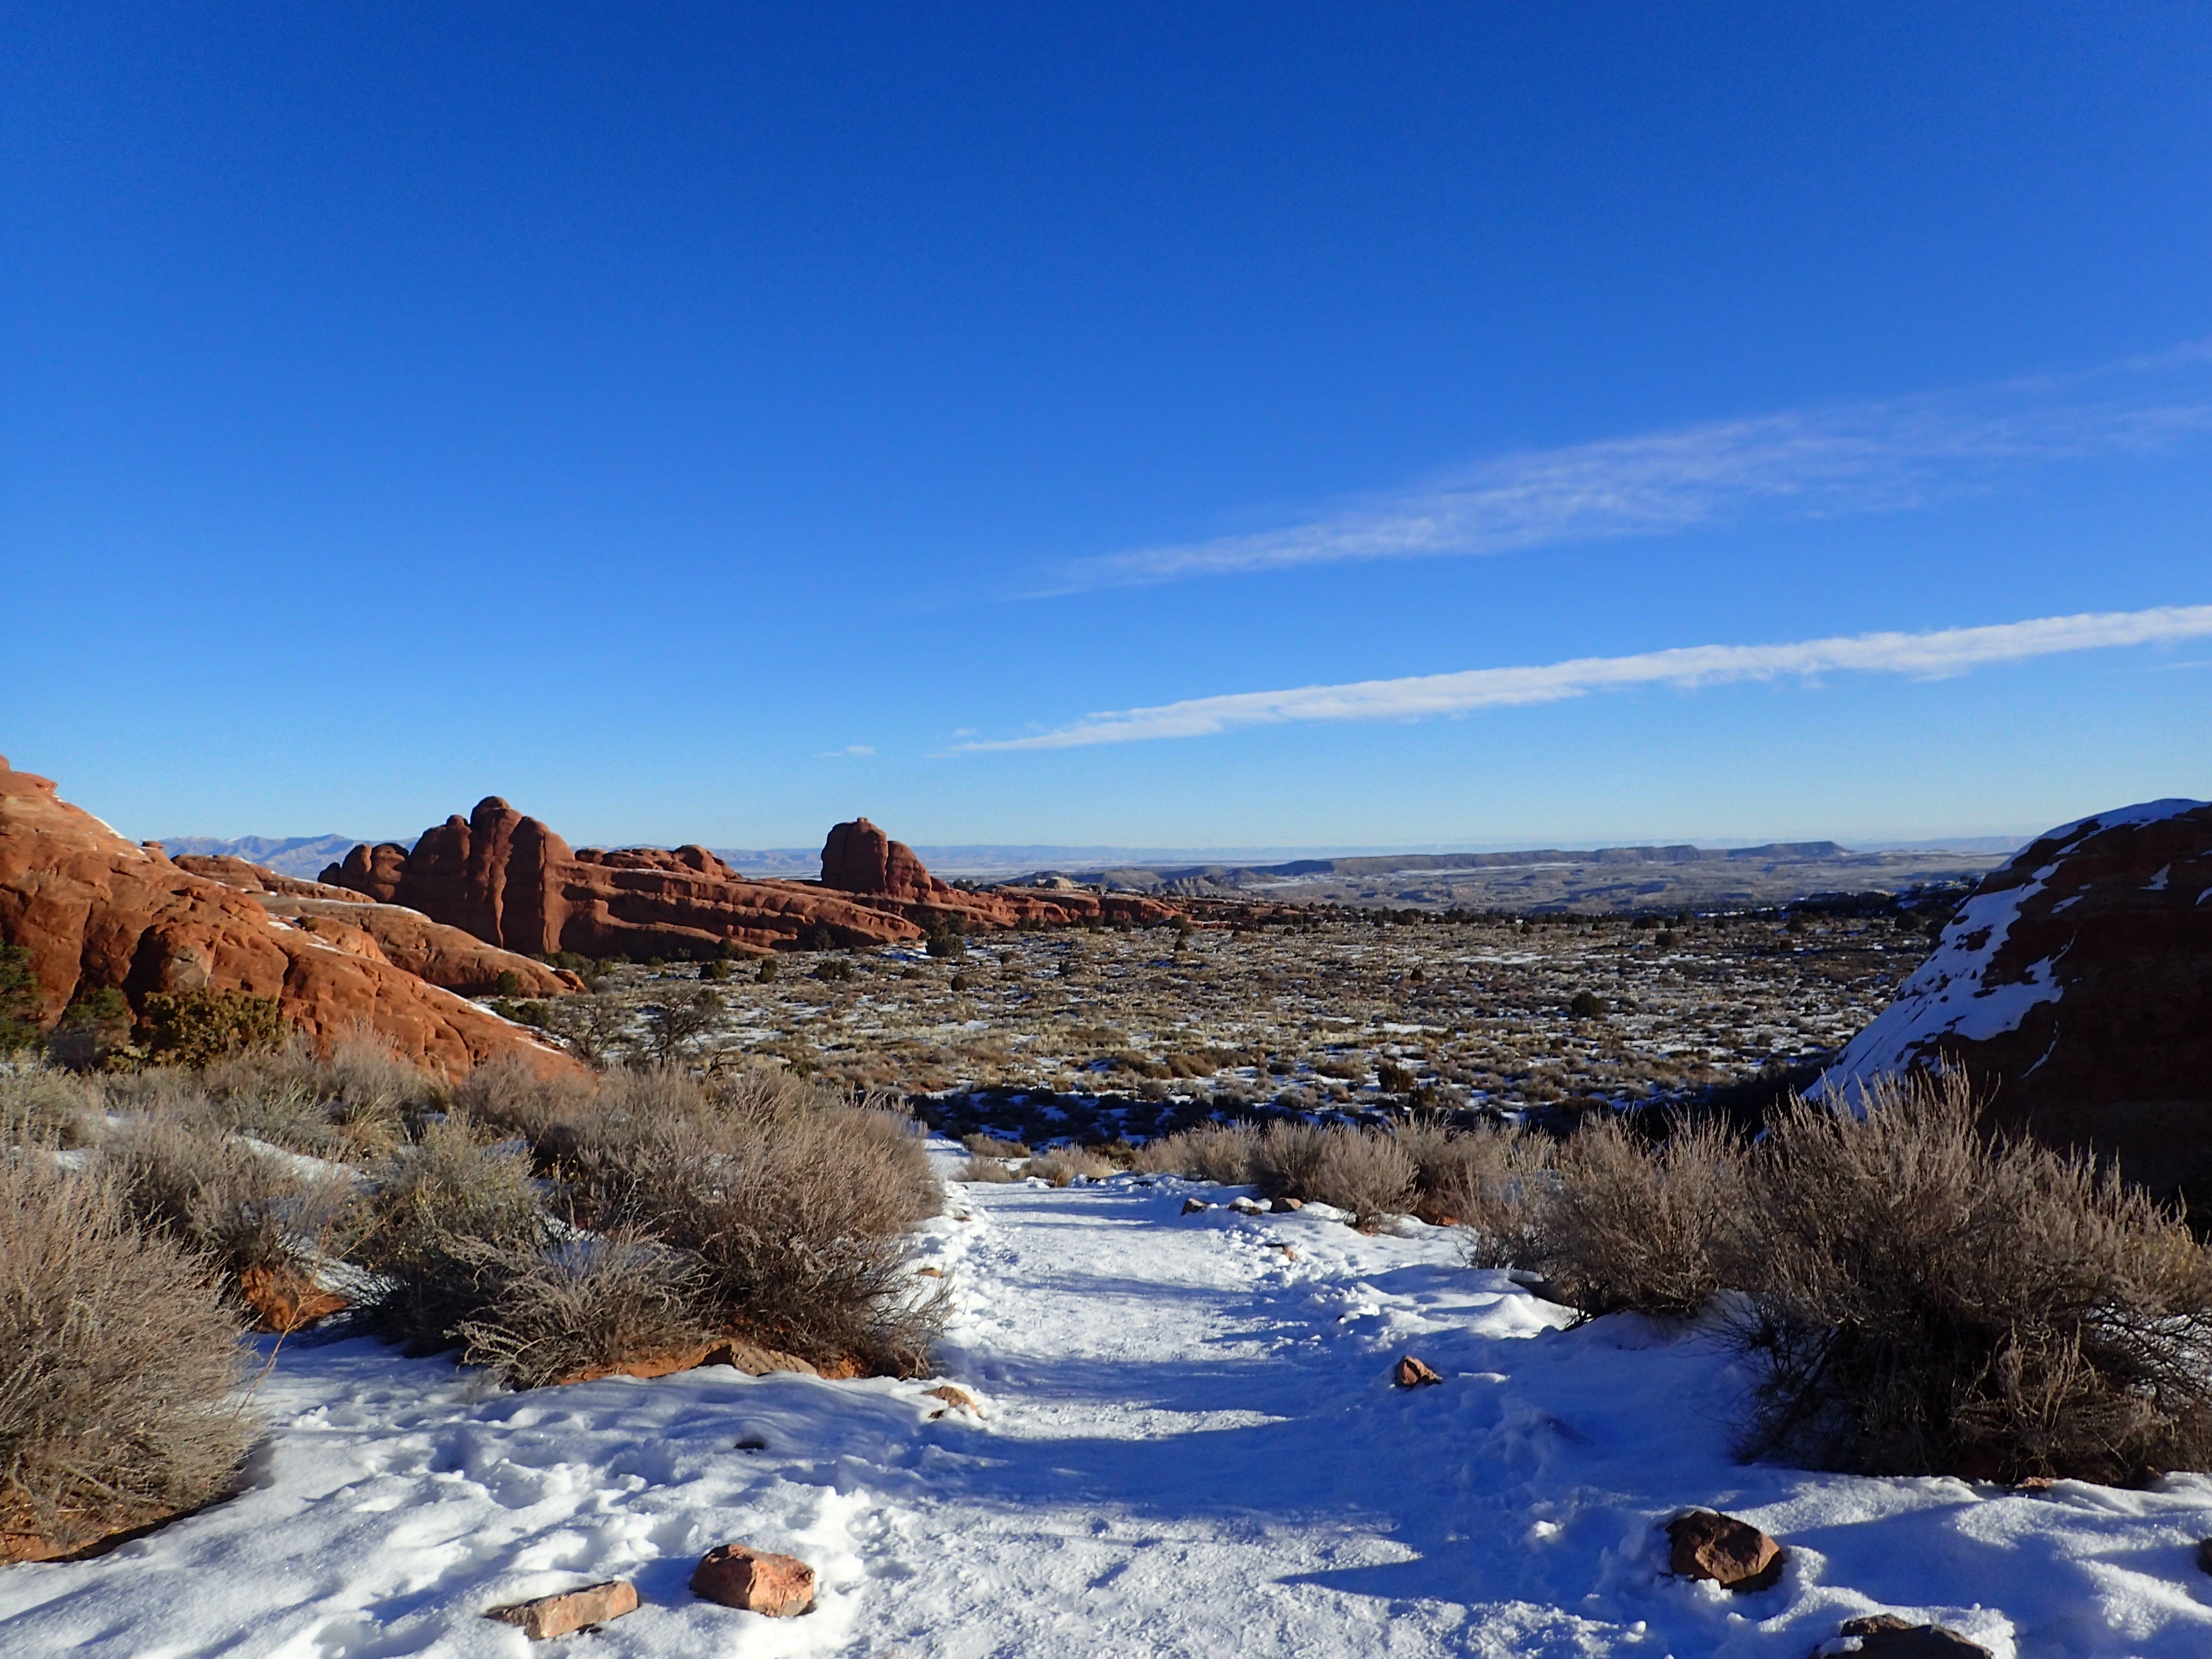
View looking out into the vast desert beyond.
The hiking at this point is quite easy and I could see this being a bit of a super highway during the busy season. It wasn’t long before we reached the first trail junction. We kept to our left and headed towards Landscape Arch.

First trail junction.
The trail after the junction continued to be flat and even as it worked its way over gently rolling hills as we made our way towards Landscape Arch.

Trail over the gently rolling hills.
As we approached Landscape arch the trail narrowed and became rockier before reaching the fenced off trail leading to the overlook for the arch. Hikers used to be able to hike right up to the arch until in the 90s a large chunk of rock detached from the arch in dramatic fashion. Since then they have blocked off the arch and limited access in order to avoid a future tragedy. Due to the geology of the park arches are constantly being created and destroyed as time takes its toll on the landscape.

Fenced off trail leading to the Landscape Arch overlook.
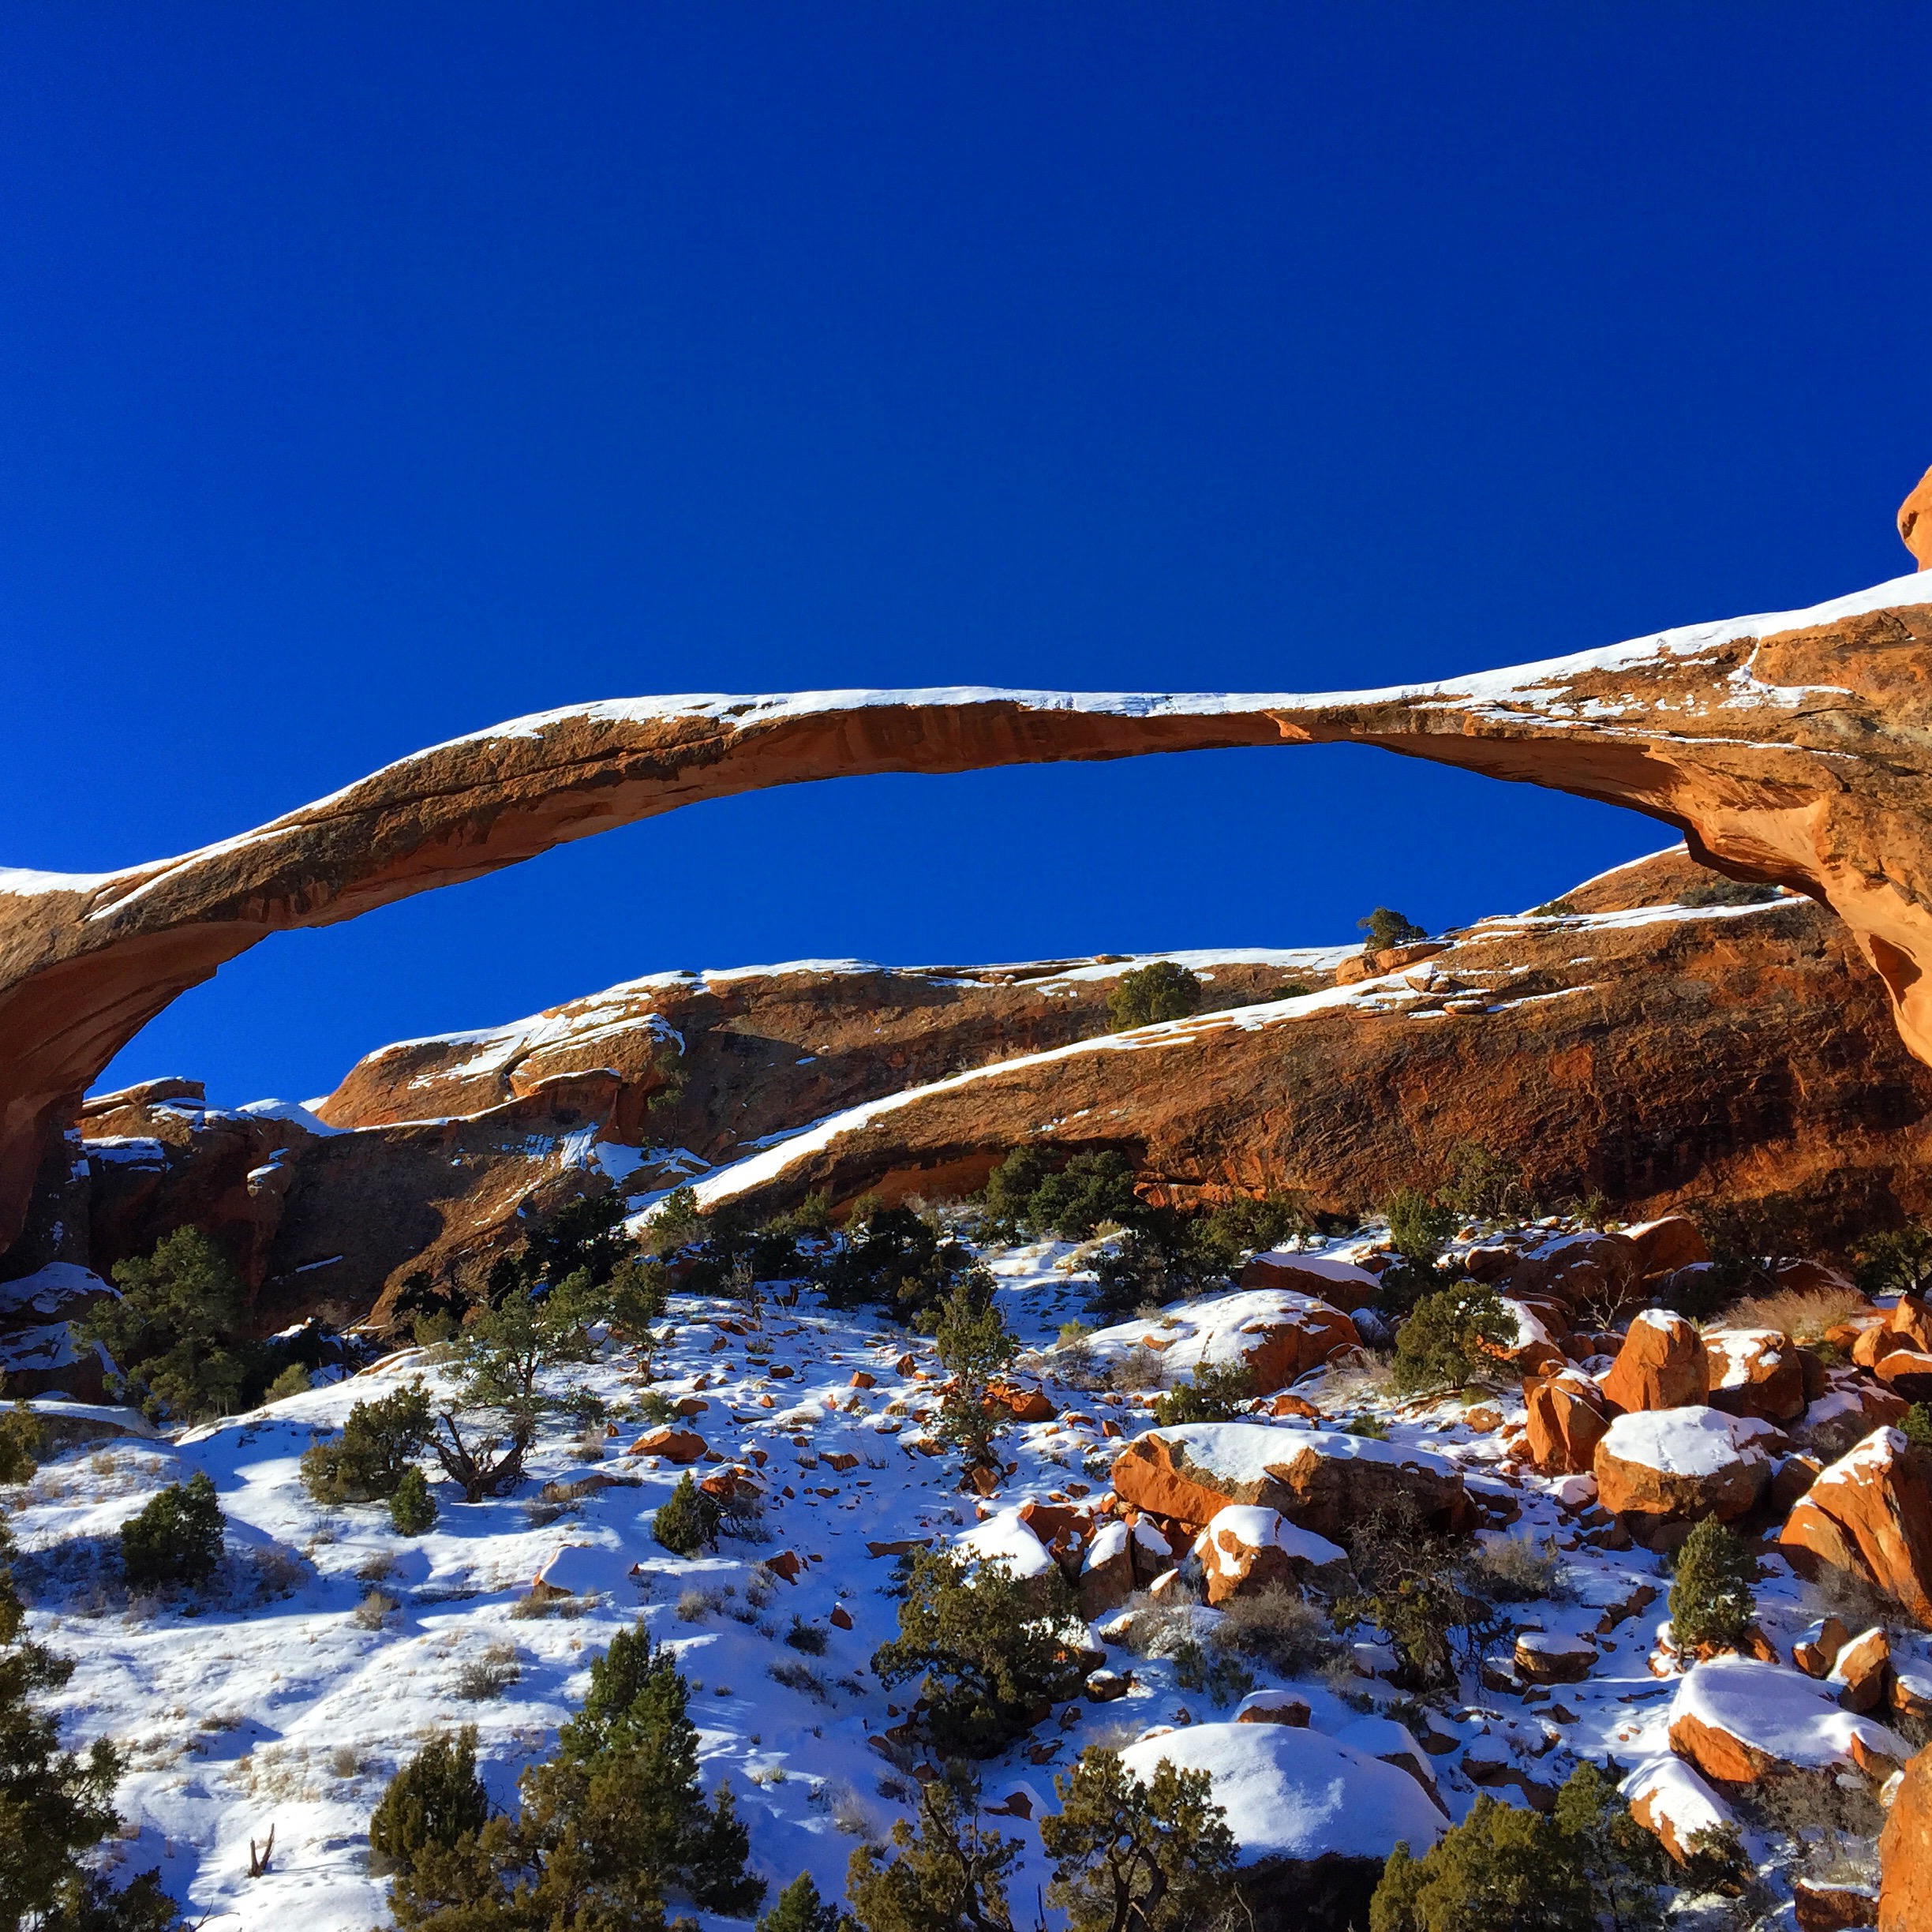
Landscape Arch under a beautifully bright blue sky.
Up until this point the trail is really more of a path that anyone could follow to enjoy the scenery. It is after this point that you have to work a bit harder for some better views and lesser visited arches, at least in comparison to Landscape arch. After taking in the views of the arch we made our way back to the trail junction for the rest of the hike.
Trail junction leading to more rugged hiking beyond Landscape Arch.
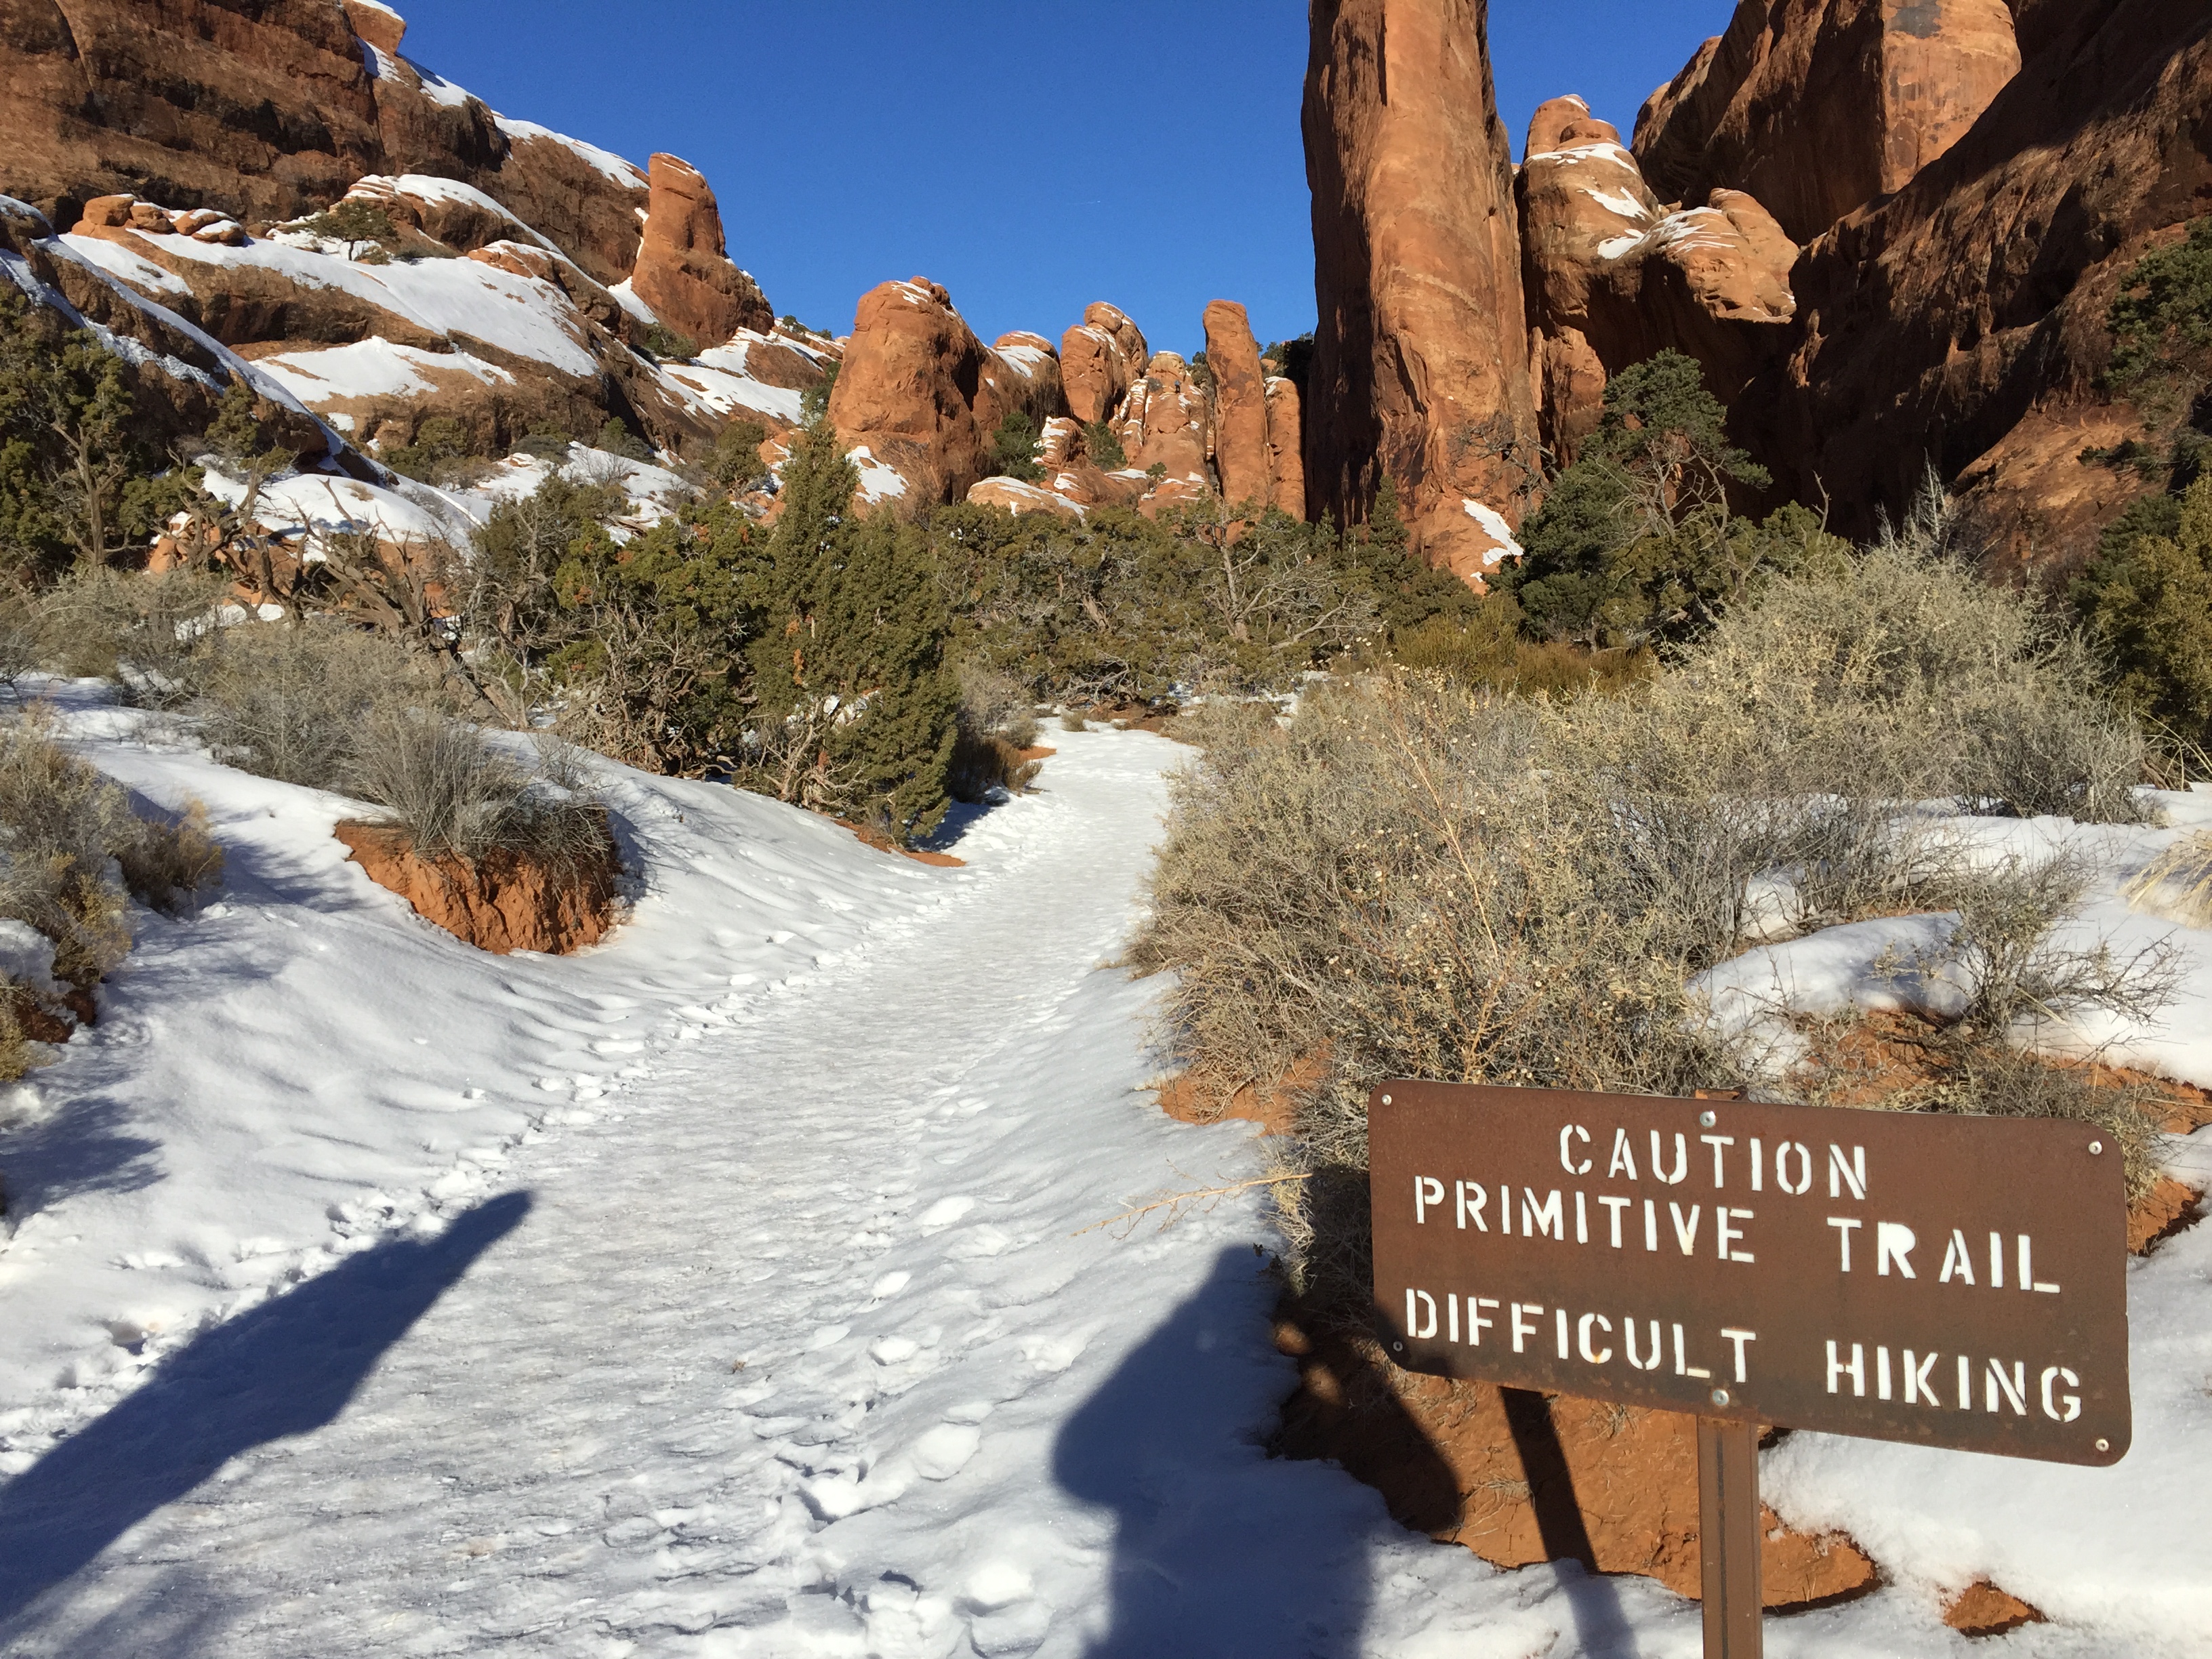
Normally I would roll my eyes at the kind of sign shown in the photo above but given this particular park and the ease it took to reach this point it does make sense. The hiking beyond may not be hard or difficult by an avid hikers standard but for everyday people who never hike it can certainly be difficult. There are even points which could be dangerous if you were not careful and took a fall.
Trail junction sign leading the way towards Double O Arch
After passing this junction the real hiking started. You work your way up a narrow ridge of sandstone that works its way up to the top of the cliffs that rise to either side of you.
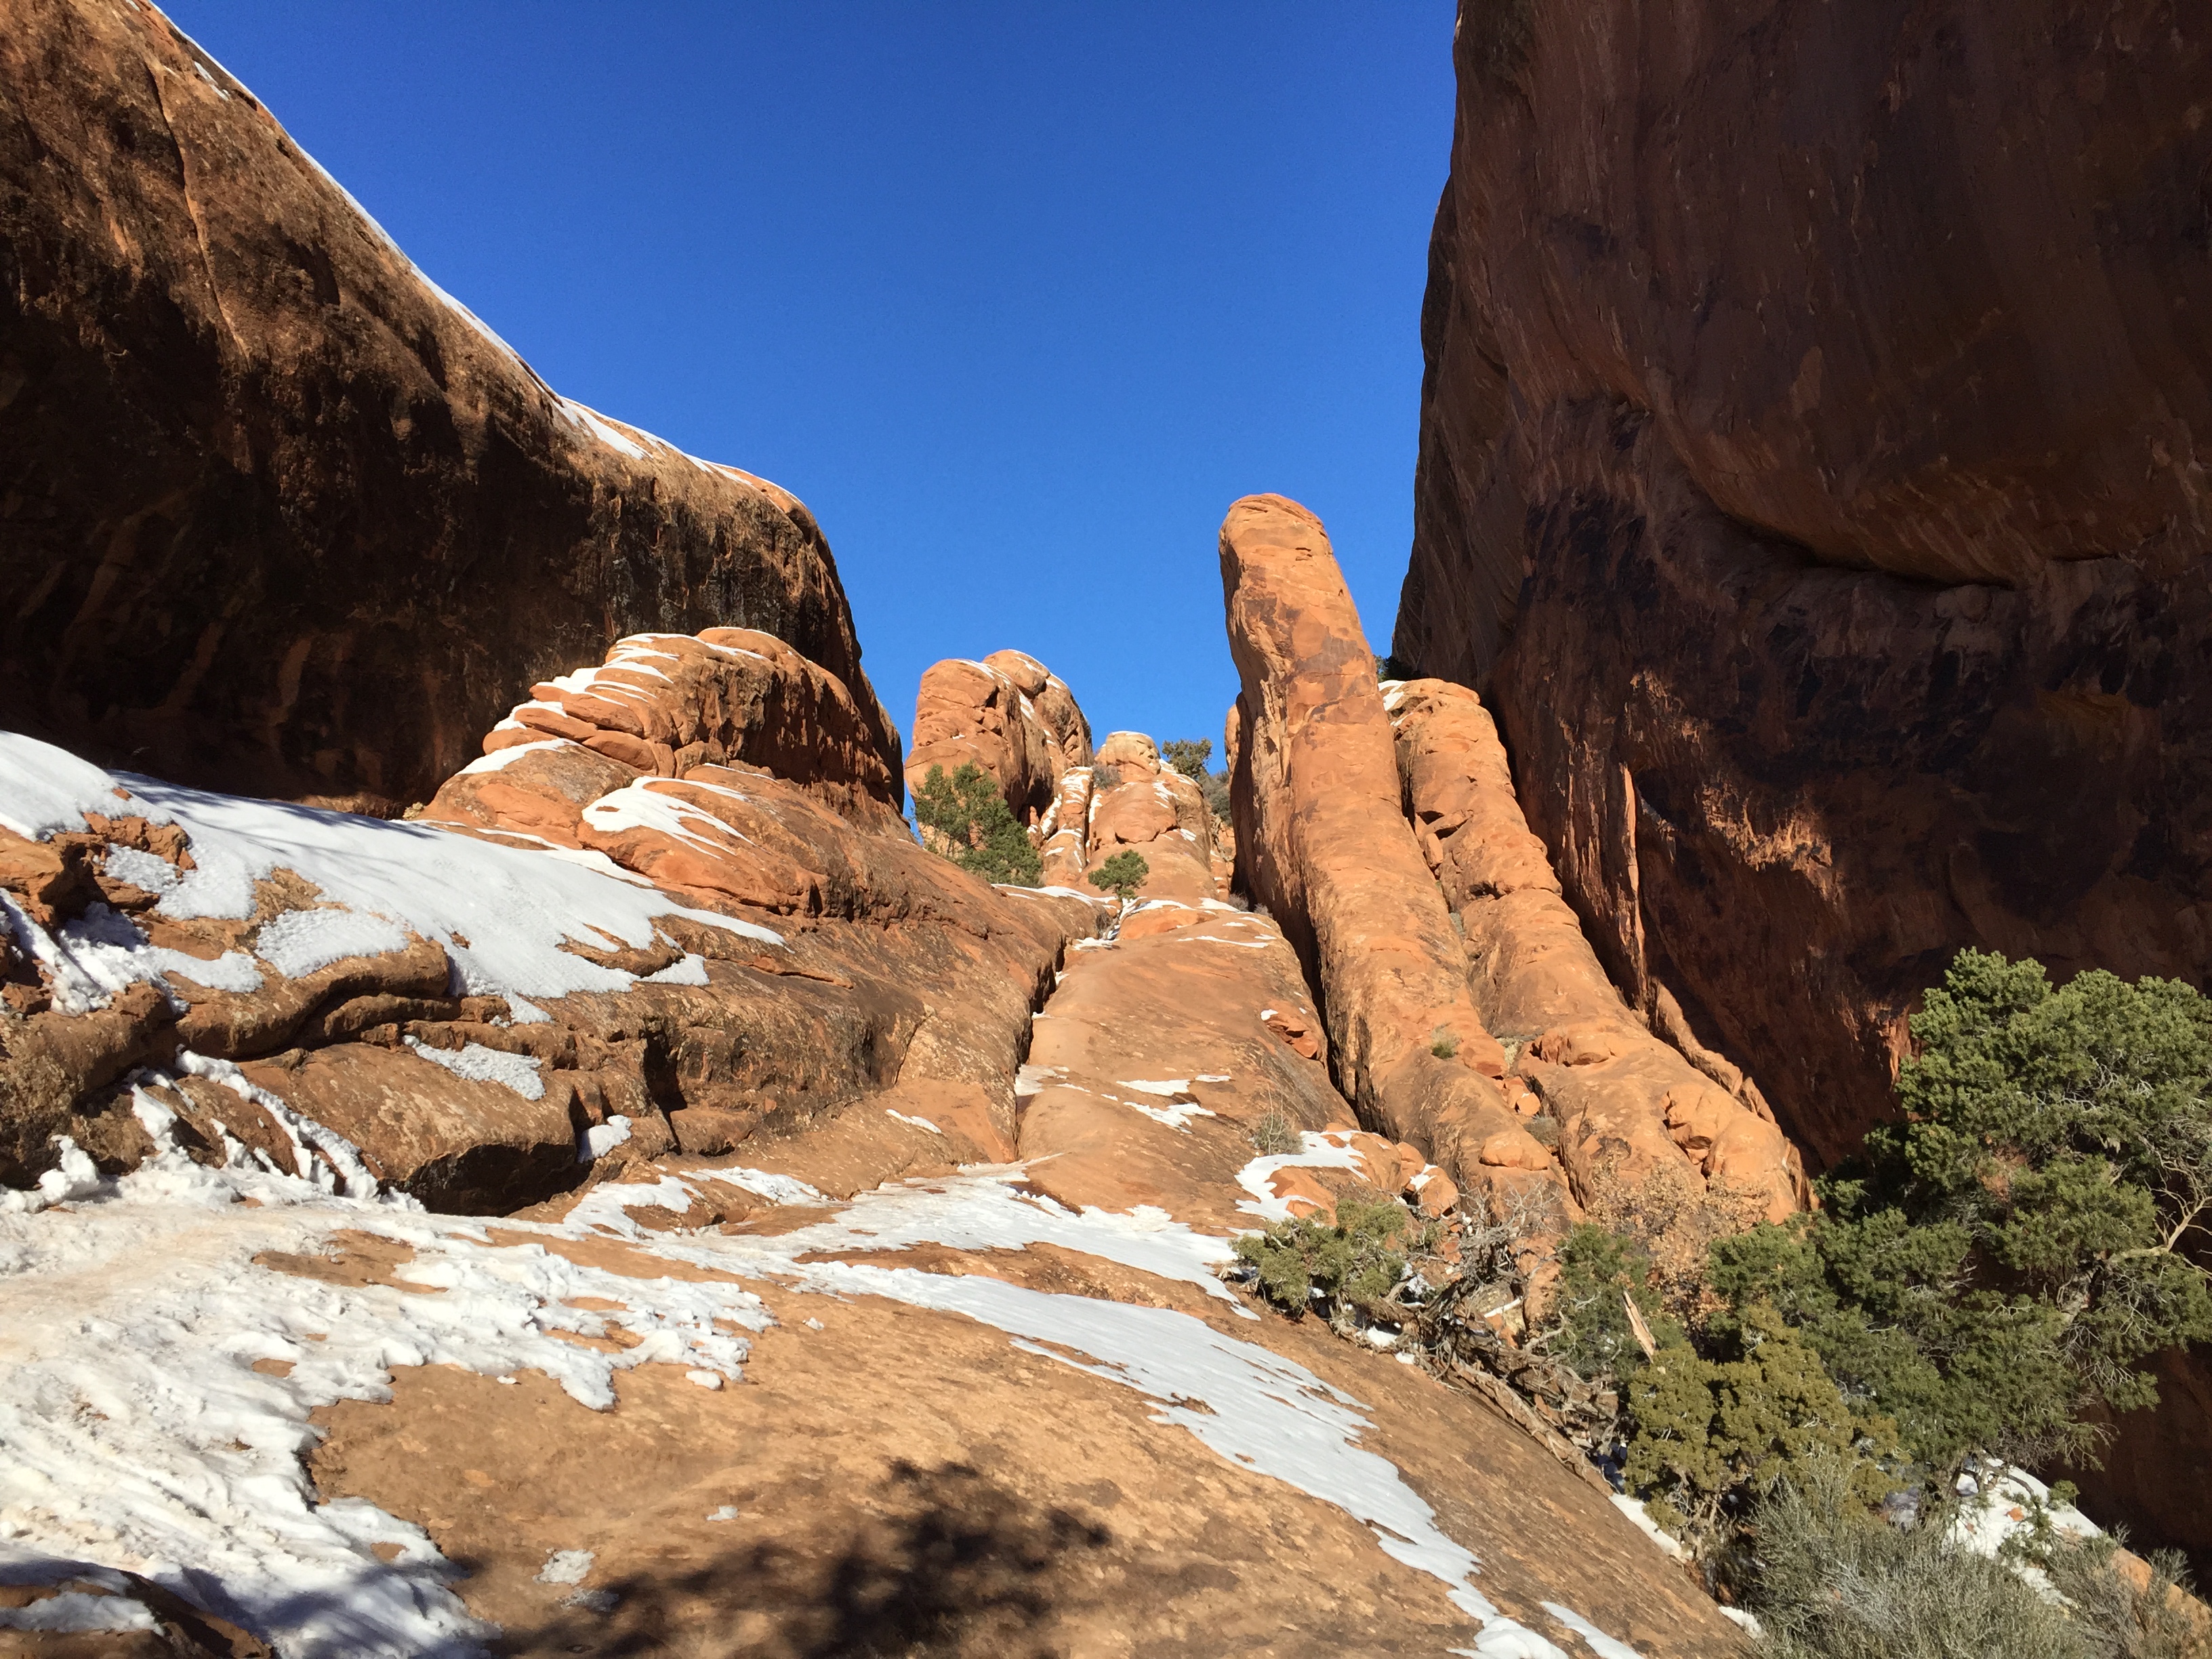
Narrow ridge leading upwards.
The above picture does not actually do the ridge justice as it is actually fairly steep and rounded with big drops off to climbers right. The rock was very grippy underfoot but I could see someone being nervous climbing up this if they didn’t have any experience in this type of situation. We followed the path of least resistance on the way up and topped out in no time.

Trail after topping out on the ridge.
Once we got to the top there was another even smaller ridge that lead back the way we came towards Landscape Arch. This ridge was covered in several inches of snow and was even more uneven and had even bigger drops on either side than the one the trail follows. I wouldn’t recommend most people walk out on it in the conditions we had but if you do you can get a nice view of Partition Arch from this side of the cliff.

Looking back at the narrow ridge.
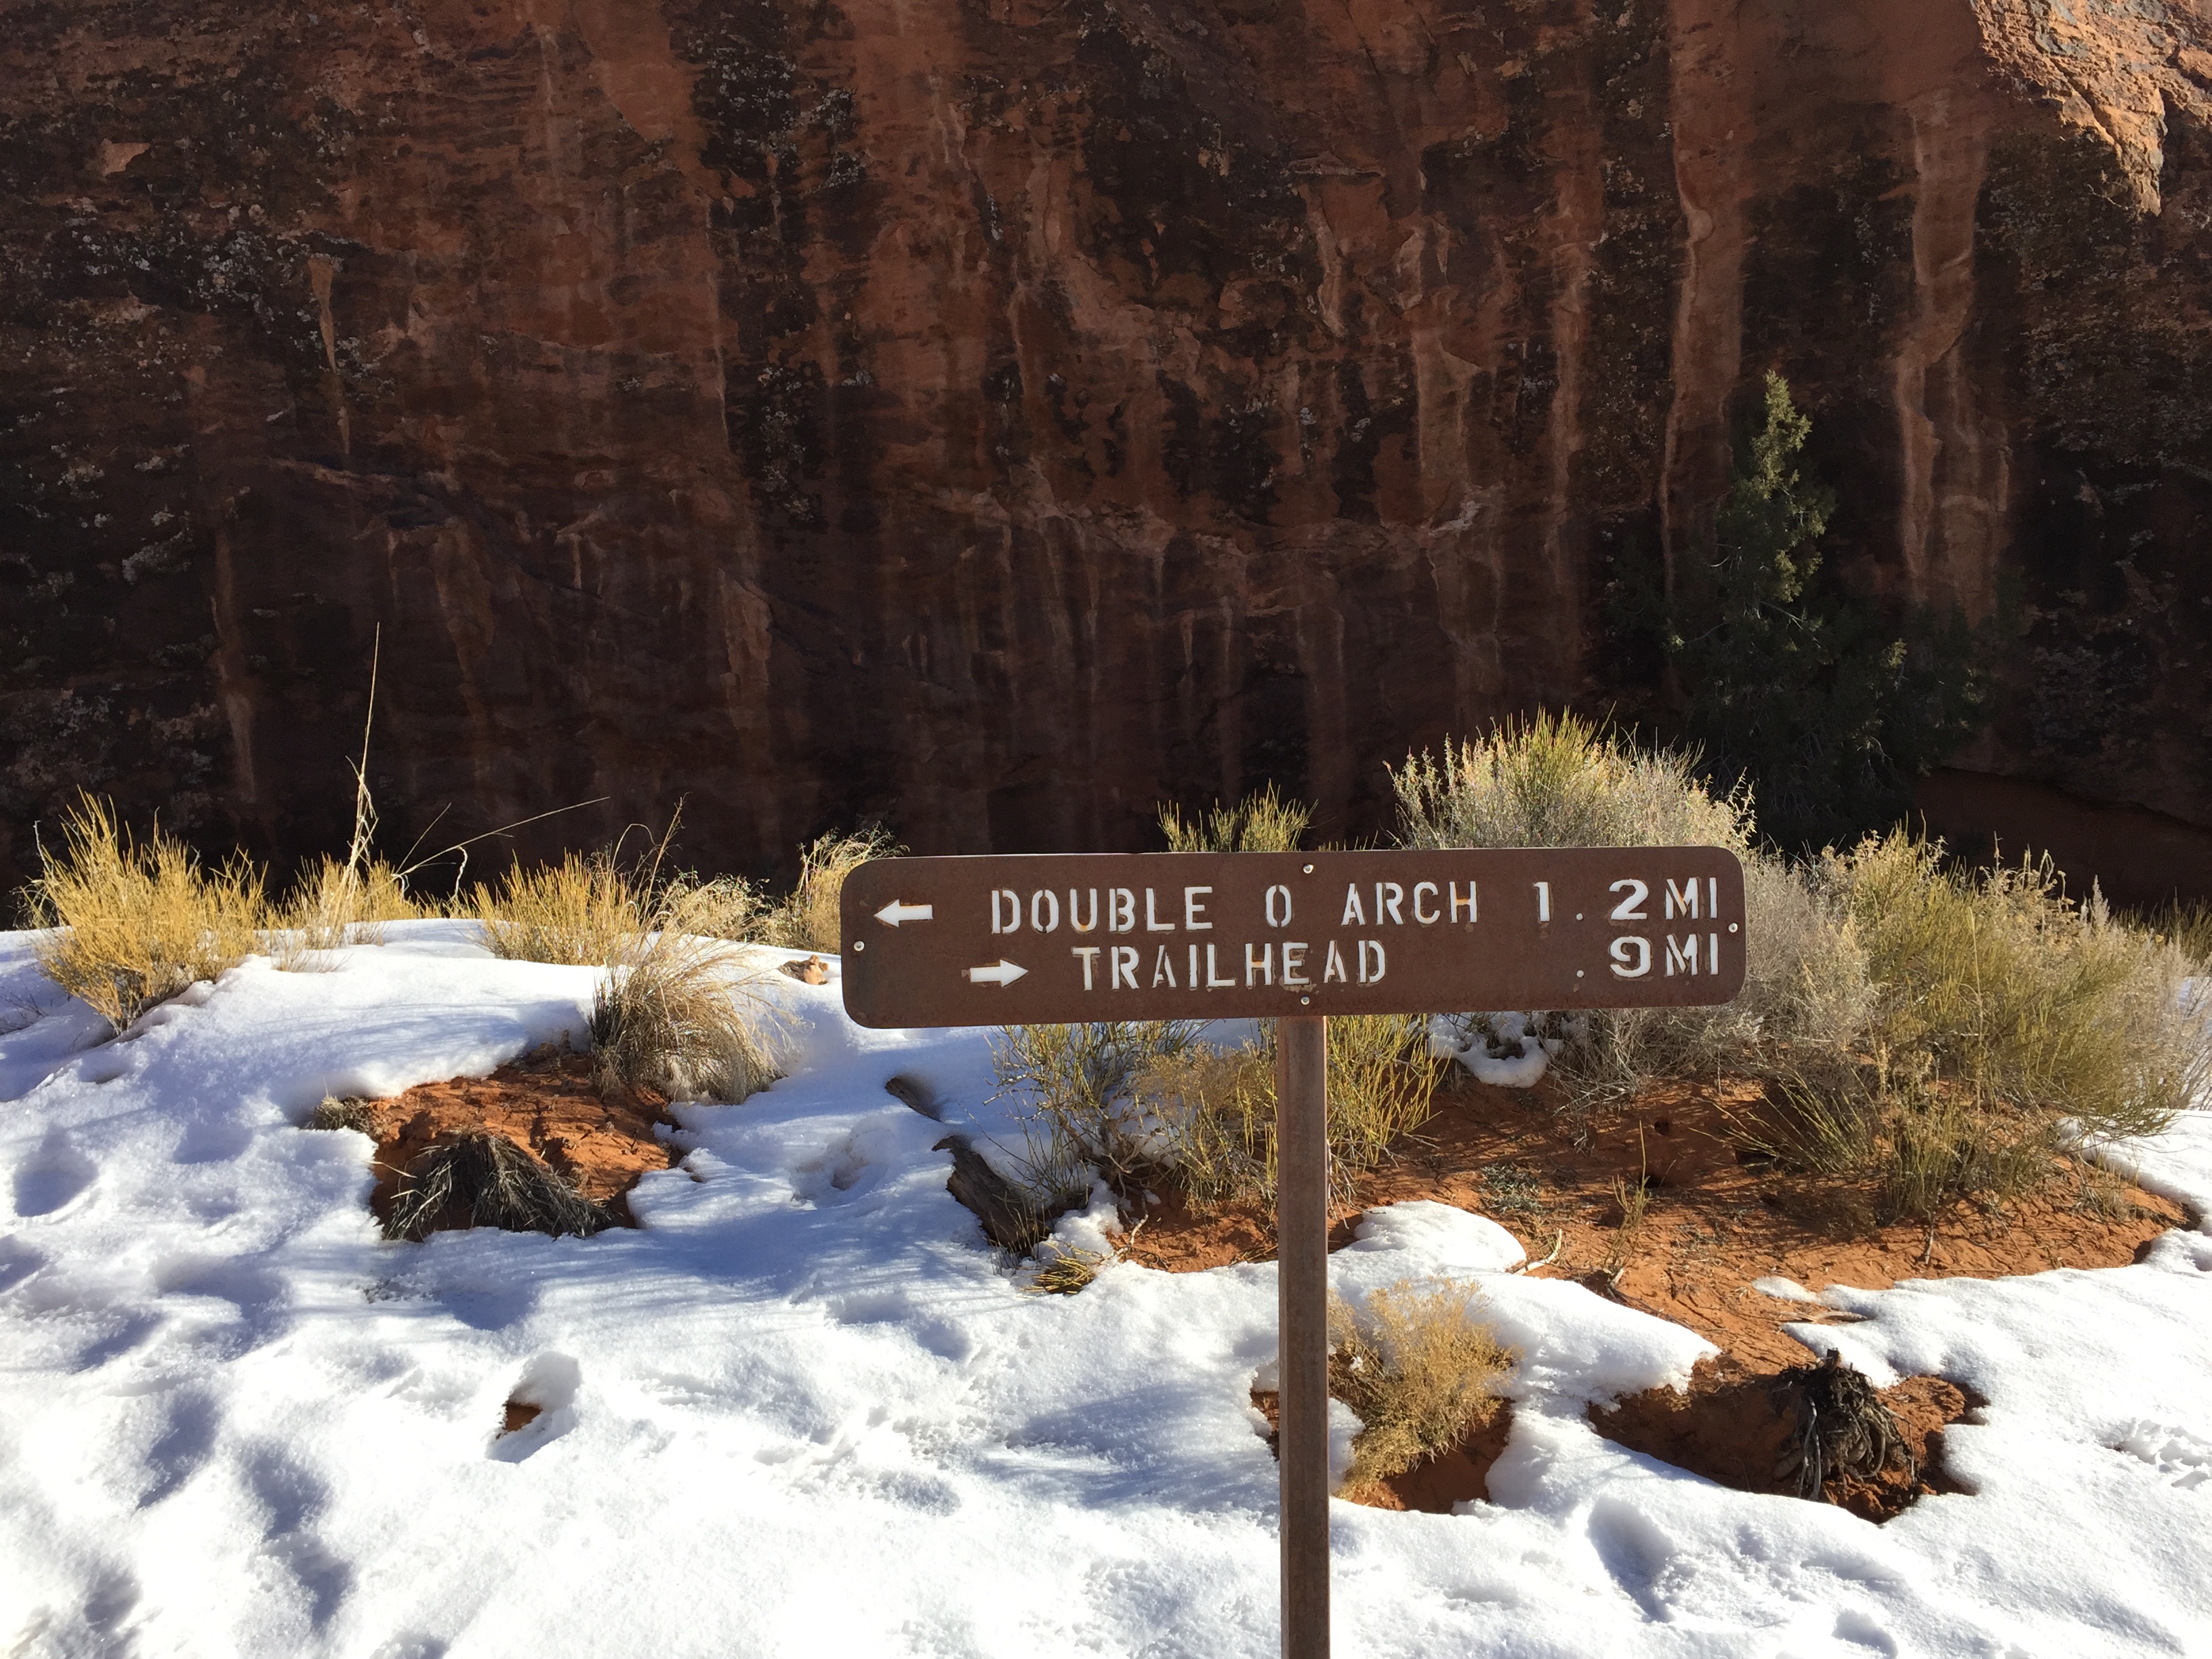
After walking just a short ways down the trail we reached the next junction that marked the way to Navajo and Partition Arch. From here you can also continue down to Double O Arch at the end of the trail but we instead decided to just do Navajo and Partition Arch.
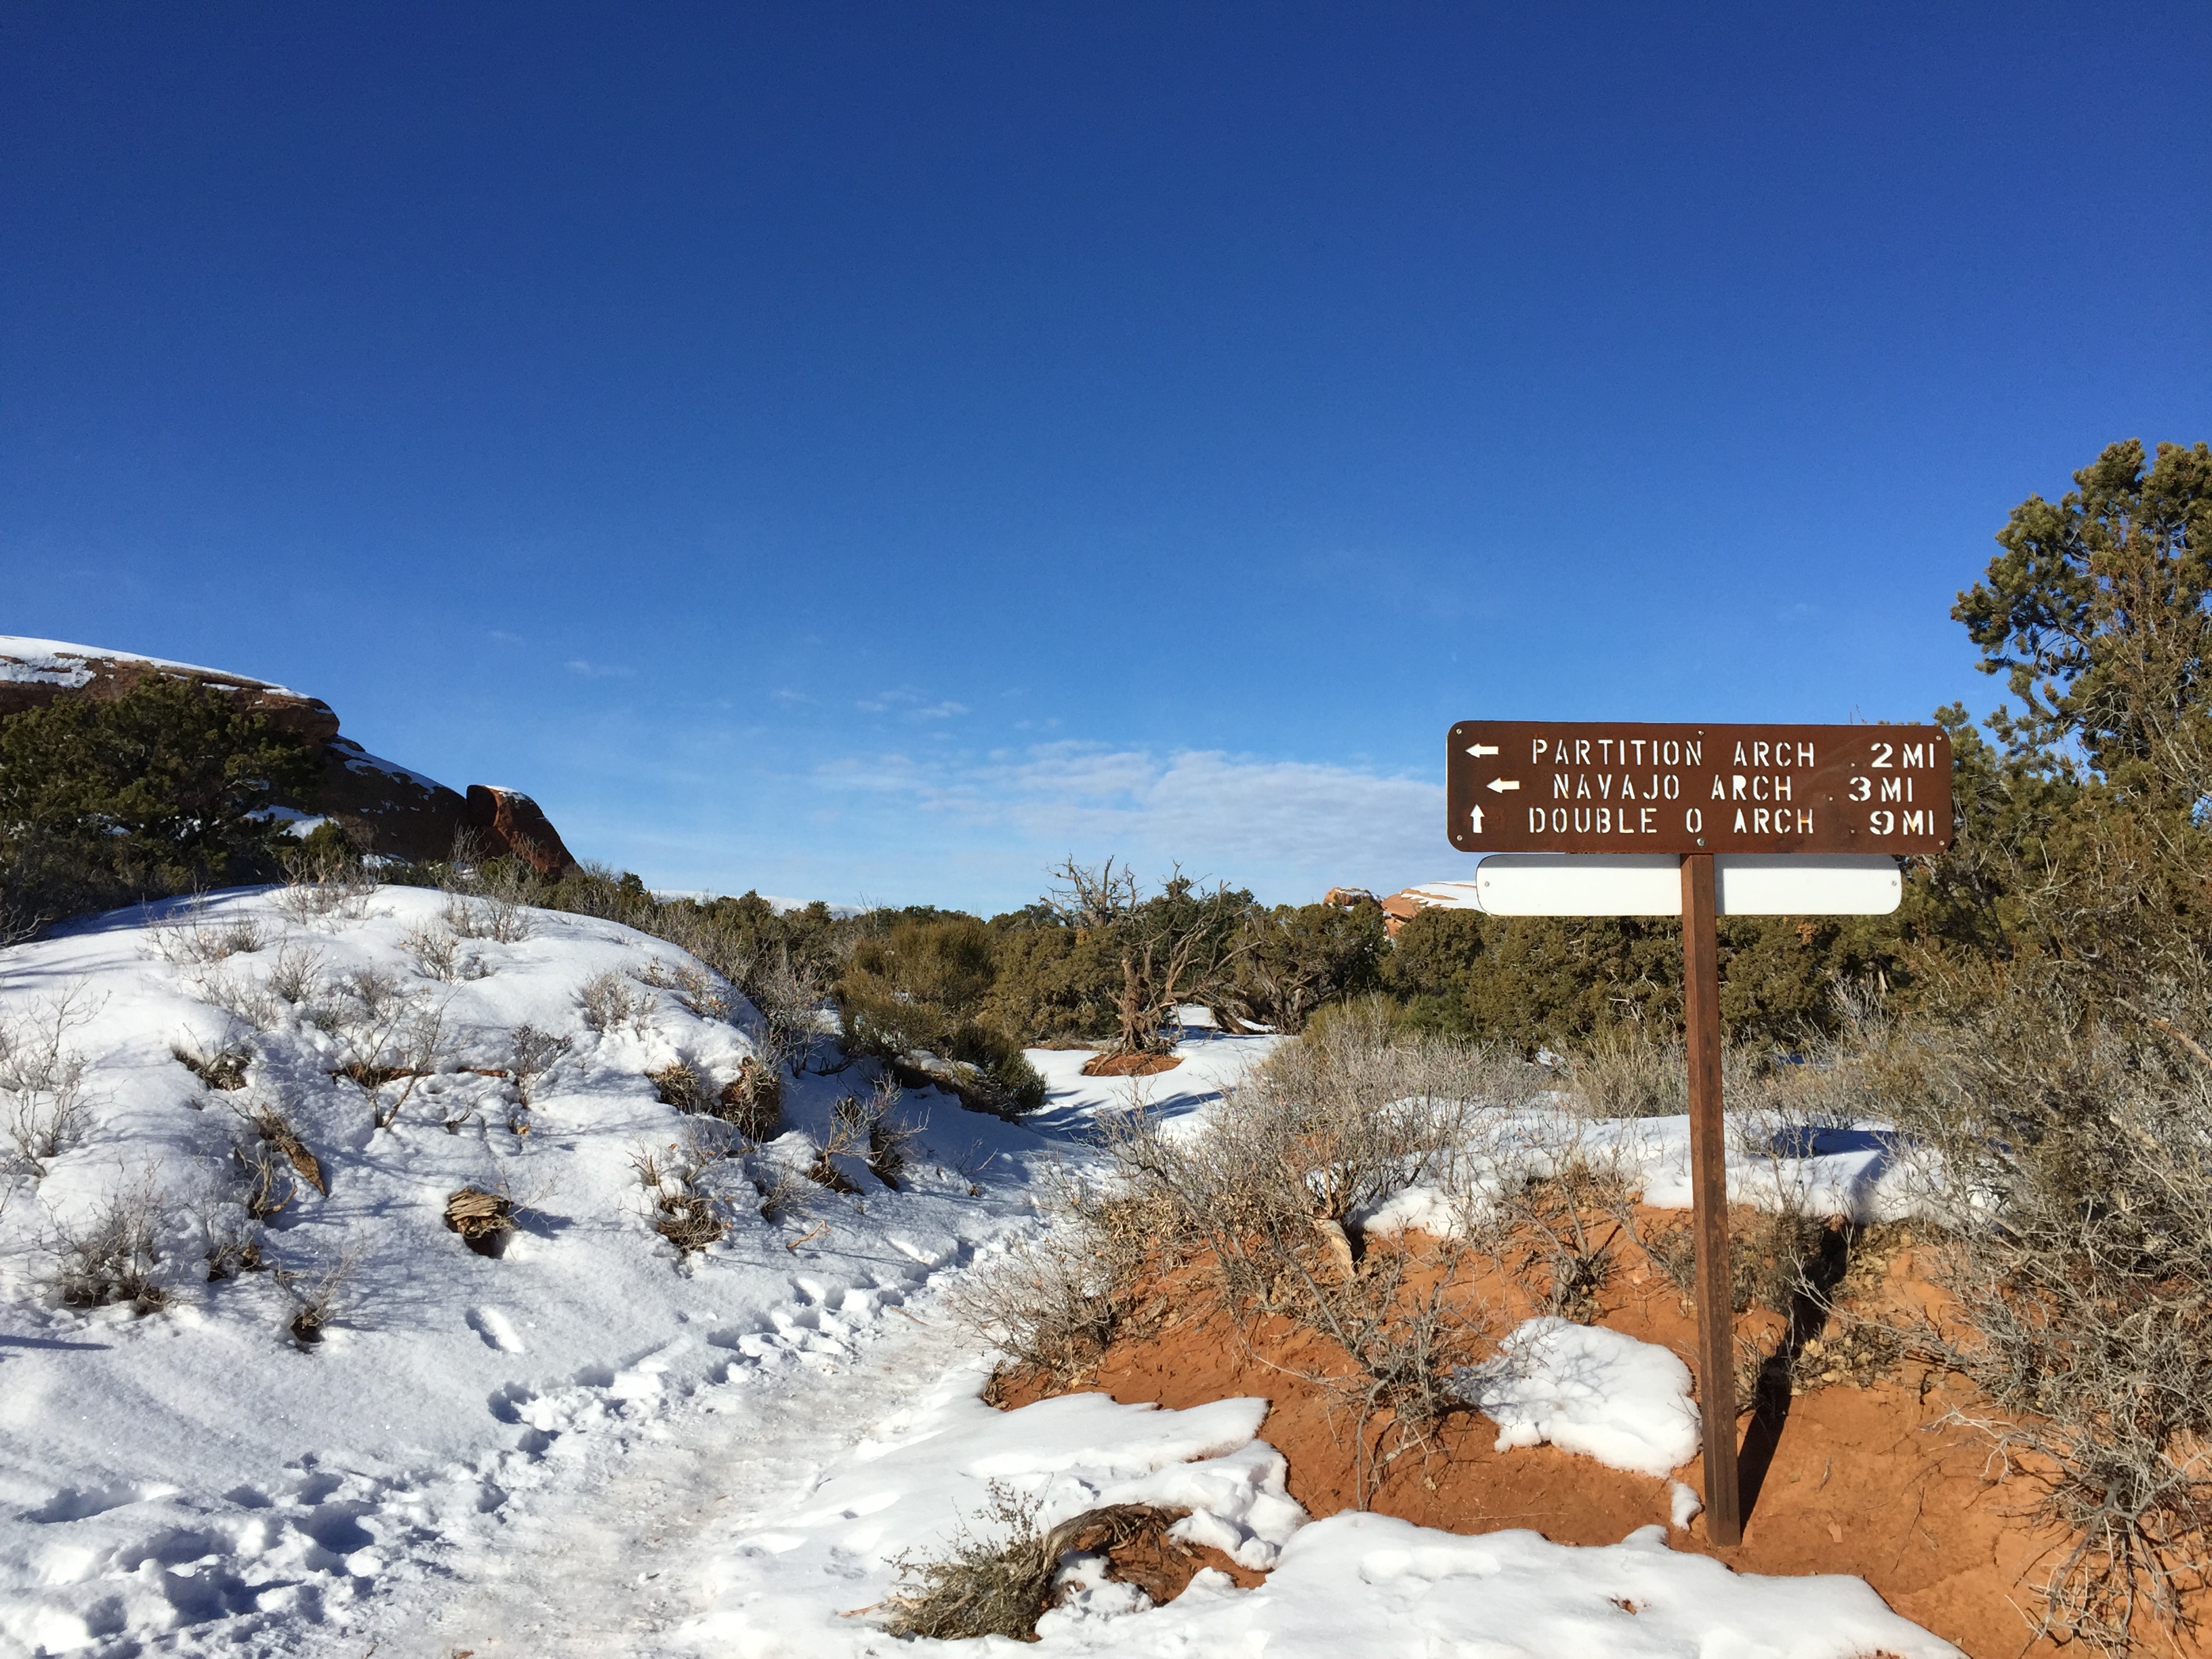
Trail junction leading to Navajo and Partition Arch.
The trail itself didn’t have much variation from what we had been hiking all day up til now but it was still very scenic and offered the same beautiful views we had been enjoying all day. At this point the sun was also shinning bright making the day feel quite warm. It was actually nice enough that I decided to take off my jacket and just hike in a short sleeve shirt which was quite nice for this time of year!

Trail junction marking the split for Navajo and Partition Arch.
We started by hiking out towards Navajo Arch as it was the one that was further away. This hike took us behind the same cliff formation which connected to Partition Arch on the opposite side.

Trail leading to Navajo Arch
Since the trail is so flat we covered the distance to the arch in no time. Navajo arch is fairly small in comparison to the others we had seen but it was nice to be able to get up close to it and even walk under it. It also had a nice quiet feel as it was nestled in between larger cliffs.
Navajo Arch
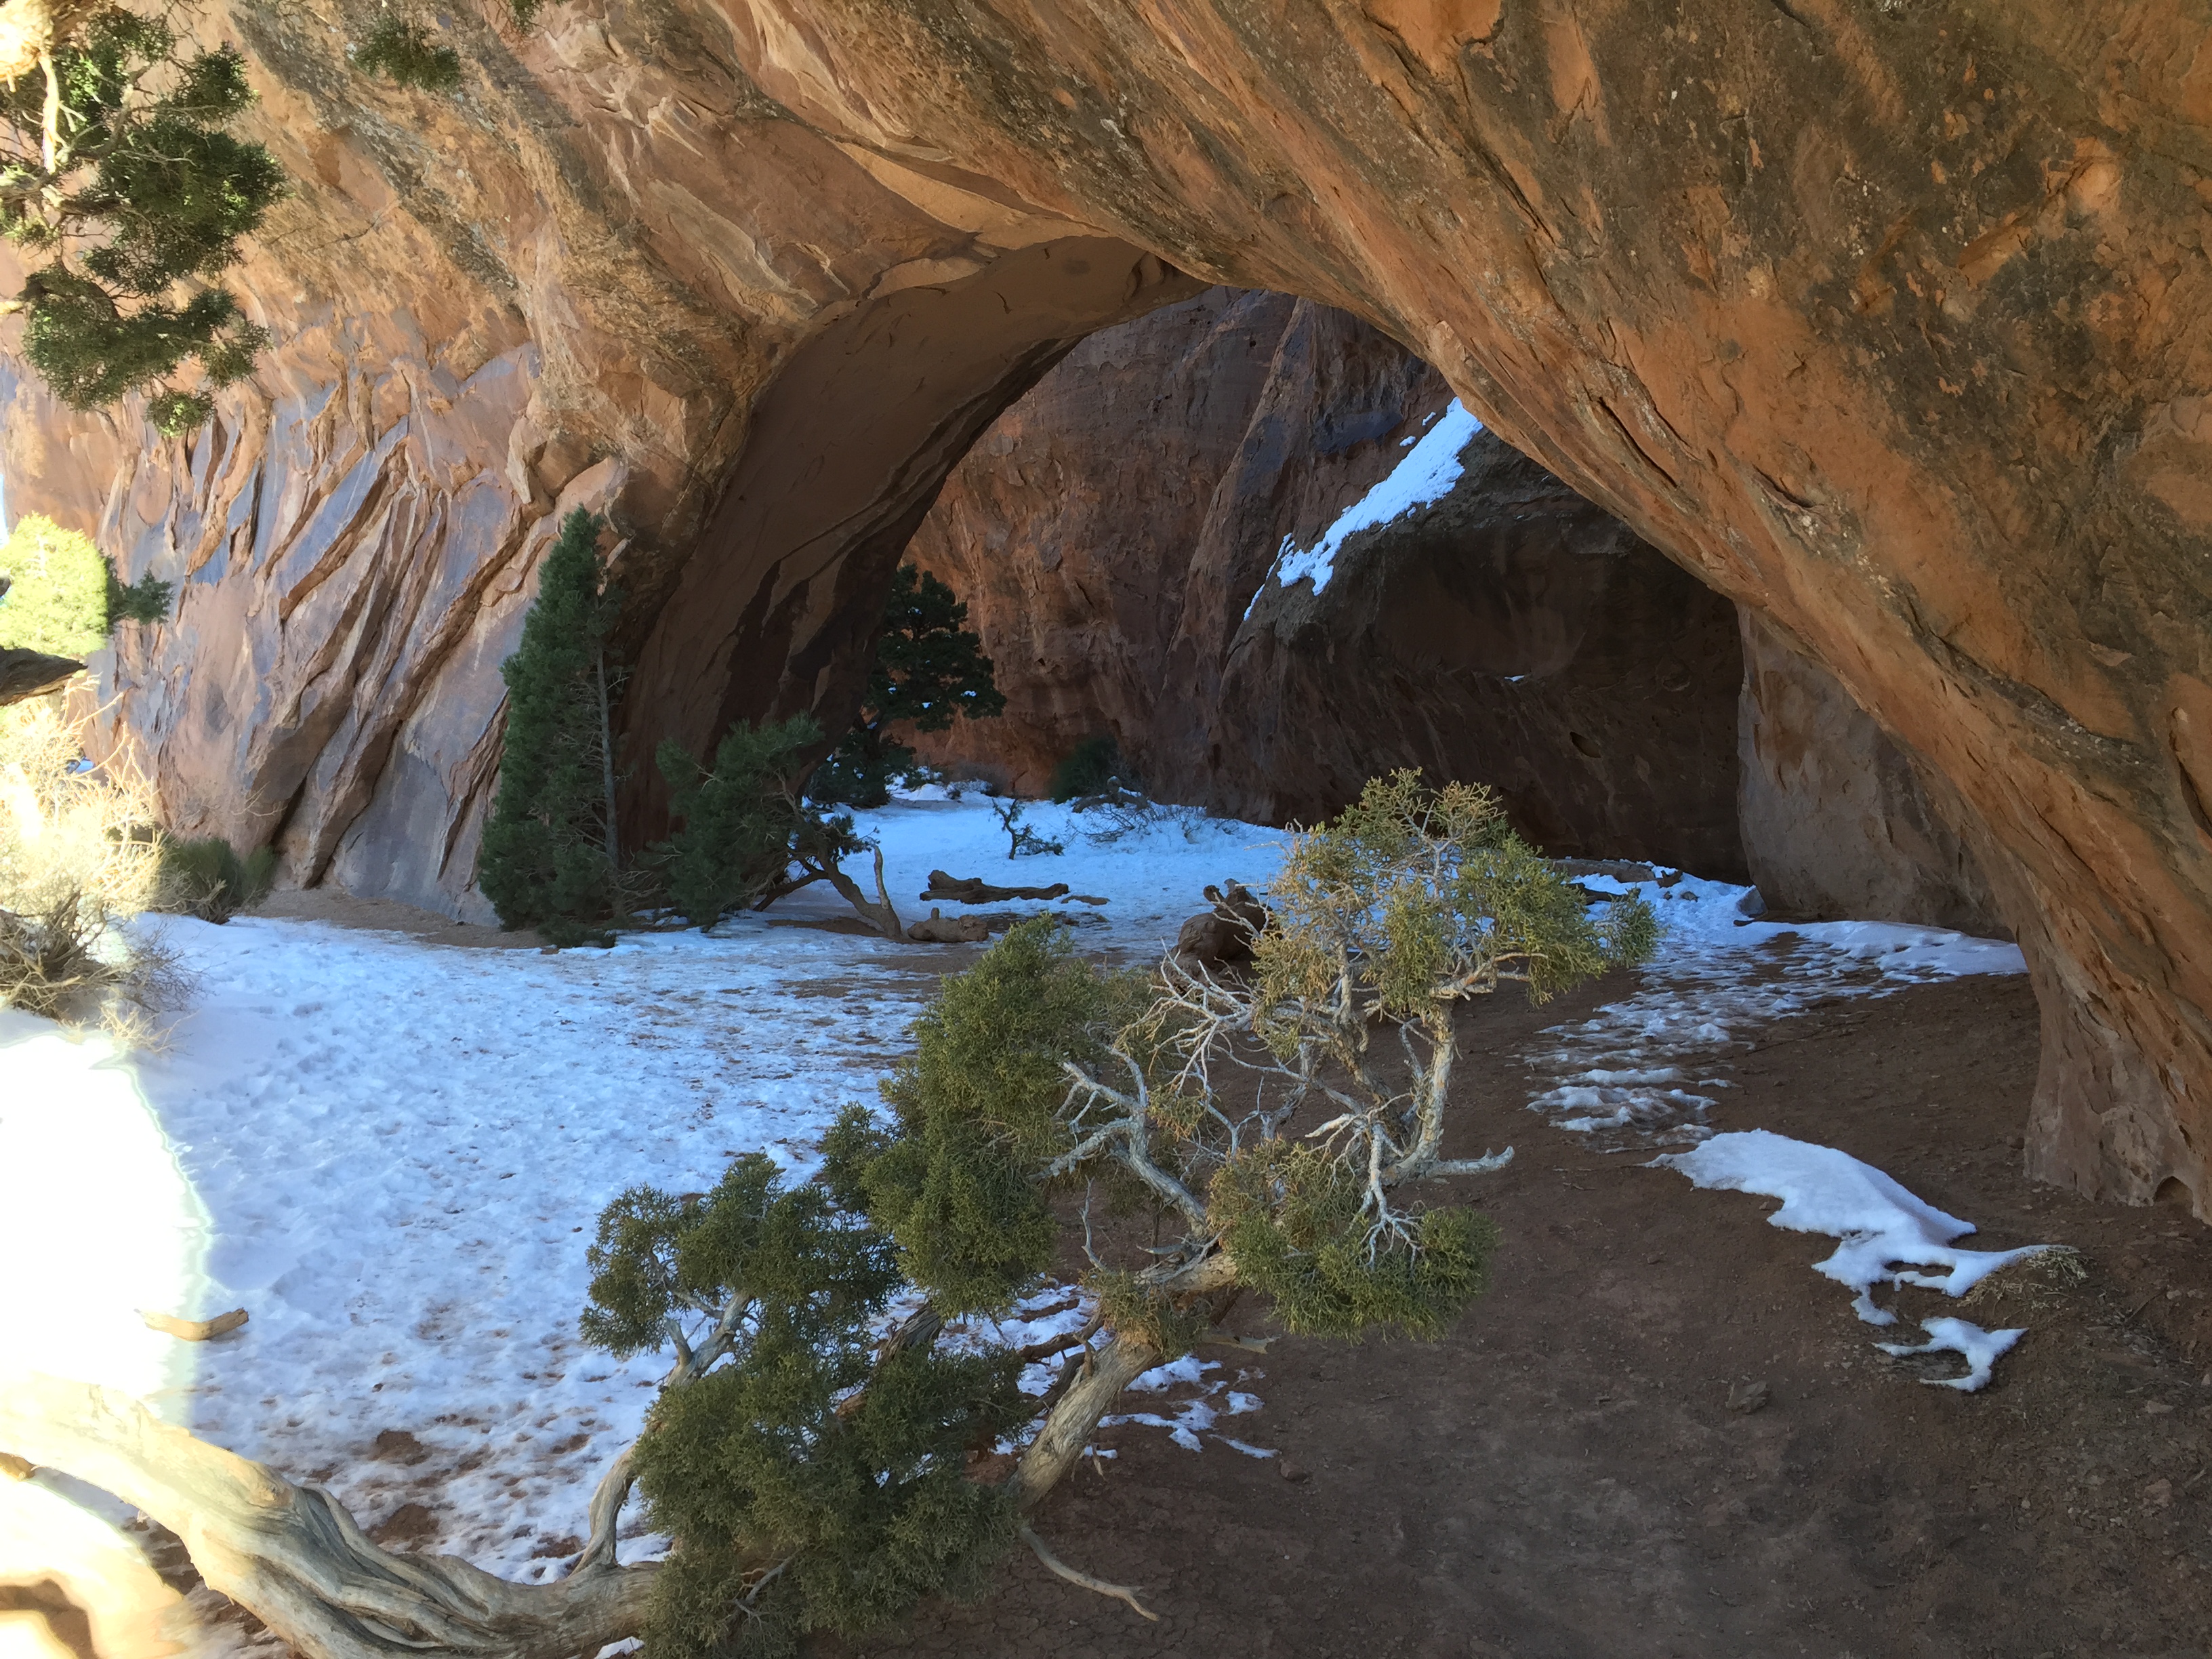
We stayed for a few minutes to explore around the arch before heading back towards the trail junction. The hike over to Partition Arch was even shorter and we reached it fairly quickly. Unlike Navajo Arch this arch was more of a window that opened up to the desert below which was a pretty dramatic feature.

Trail leading to Partition Arch

Looking through the window that is Partition Arch
Partition Arch was very dramatic and I was glad that we took the time to stop at it. We stayed here for a while taking in the view before deciding to get a move on back down to the car. It would have been nice to continue on to Double O but we had a long drive to Colorado in our future so we knew we couldn’t linger too long. The hike back was fairly uneventful but the hike back down the narrow ridge was a little exciting. On our way out we saw a lot more people coming up as we passed by so it seemed like we had just beat the crowds. We made it back to the car probably about an hour or two after we had started.
On our way back out of the park we decided to stop at some of the more easily accessible views along the way. All of these are easily found off the road at their respective stops so I wont go into great detail explaining them here and instead just post some photos.

Skyline Arch

The LaSalle Mountains in the distance.
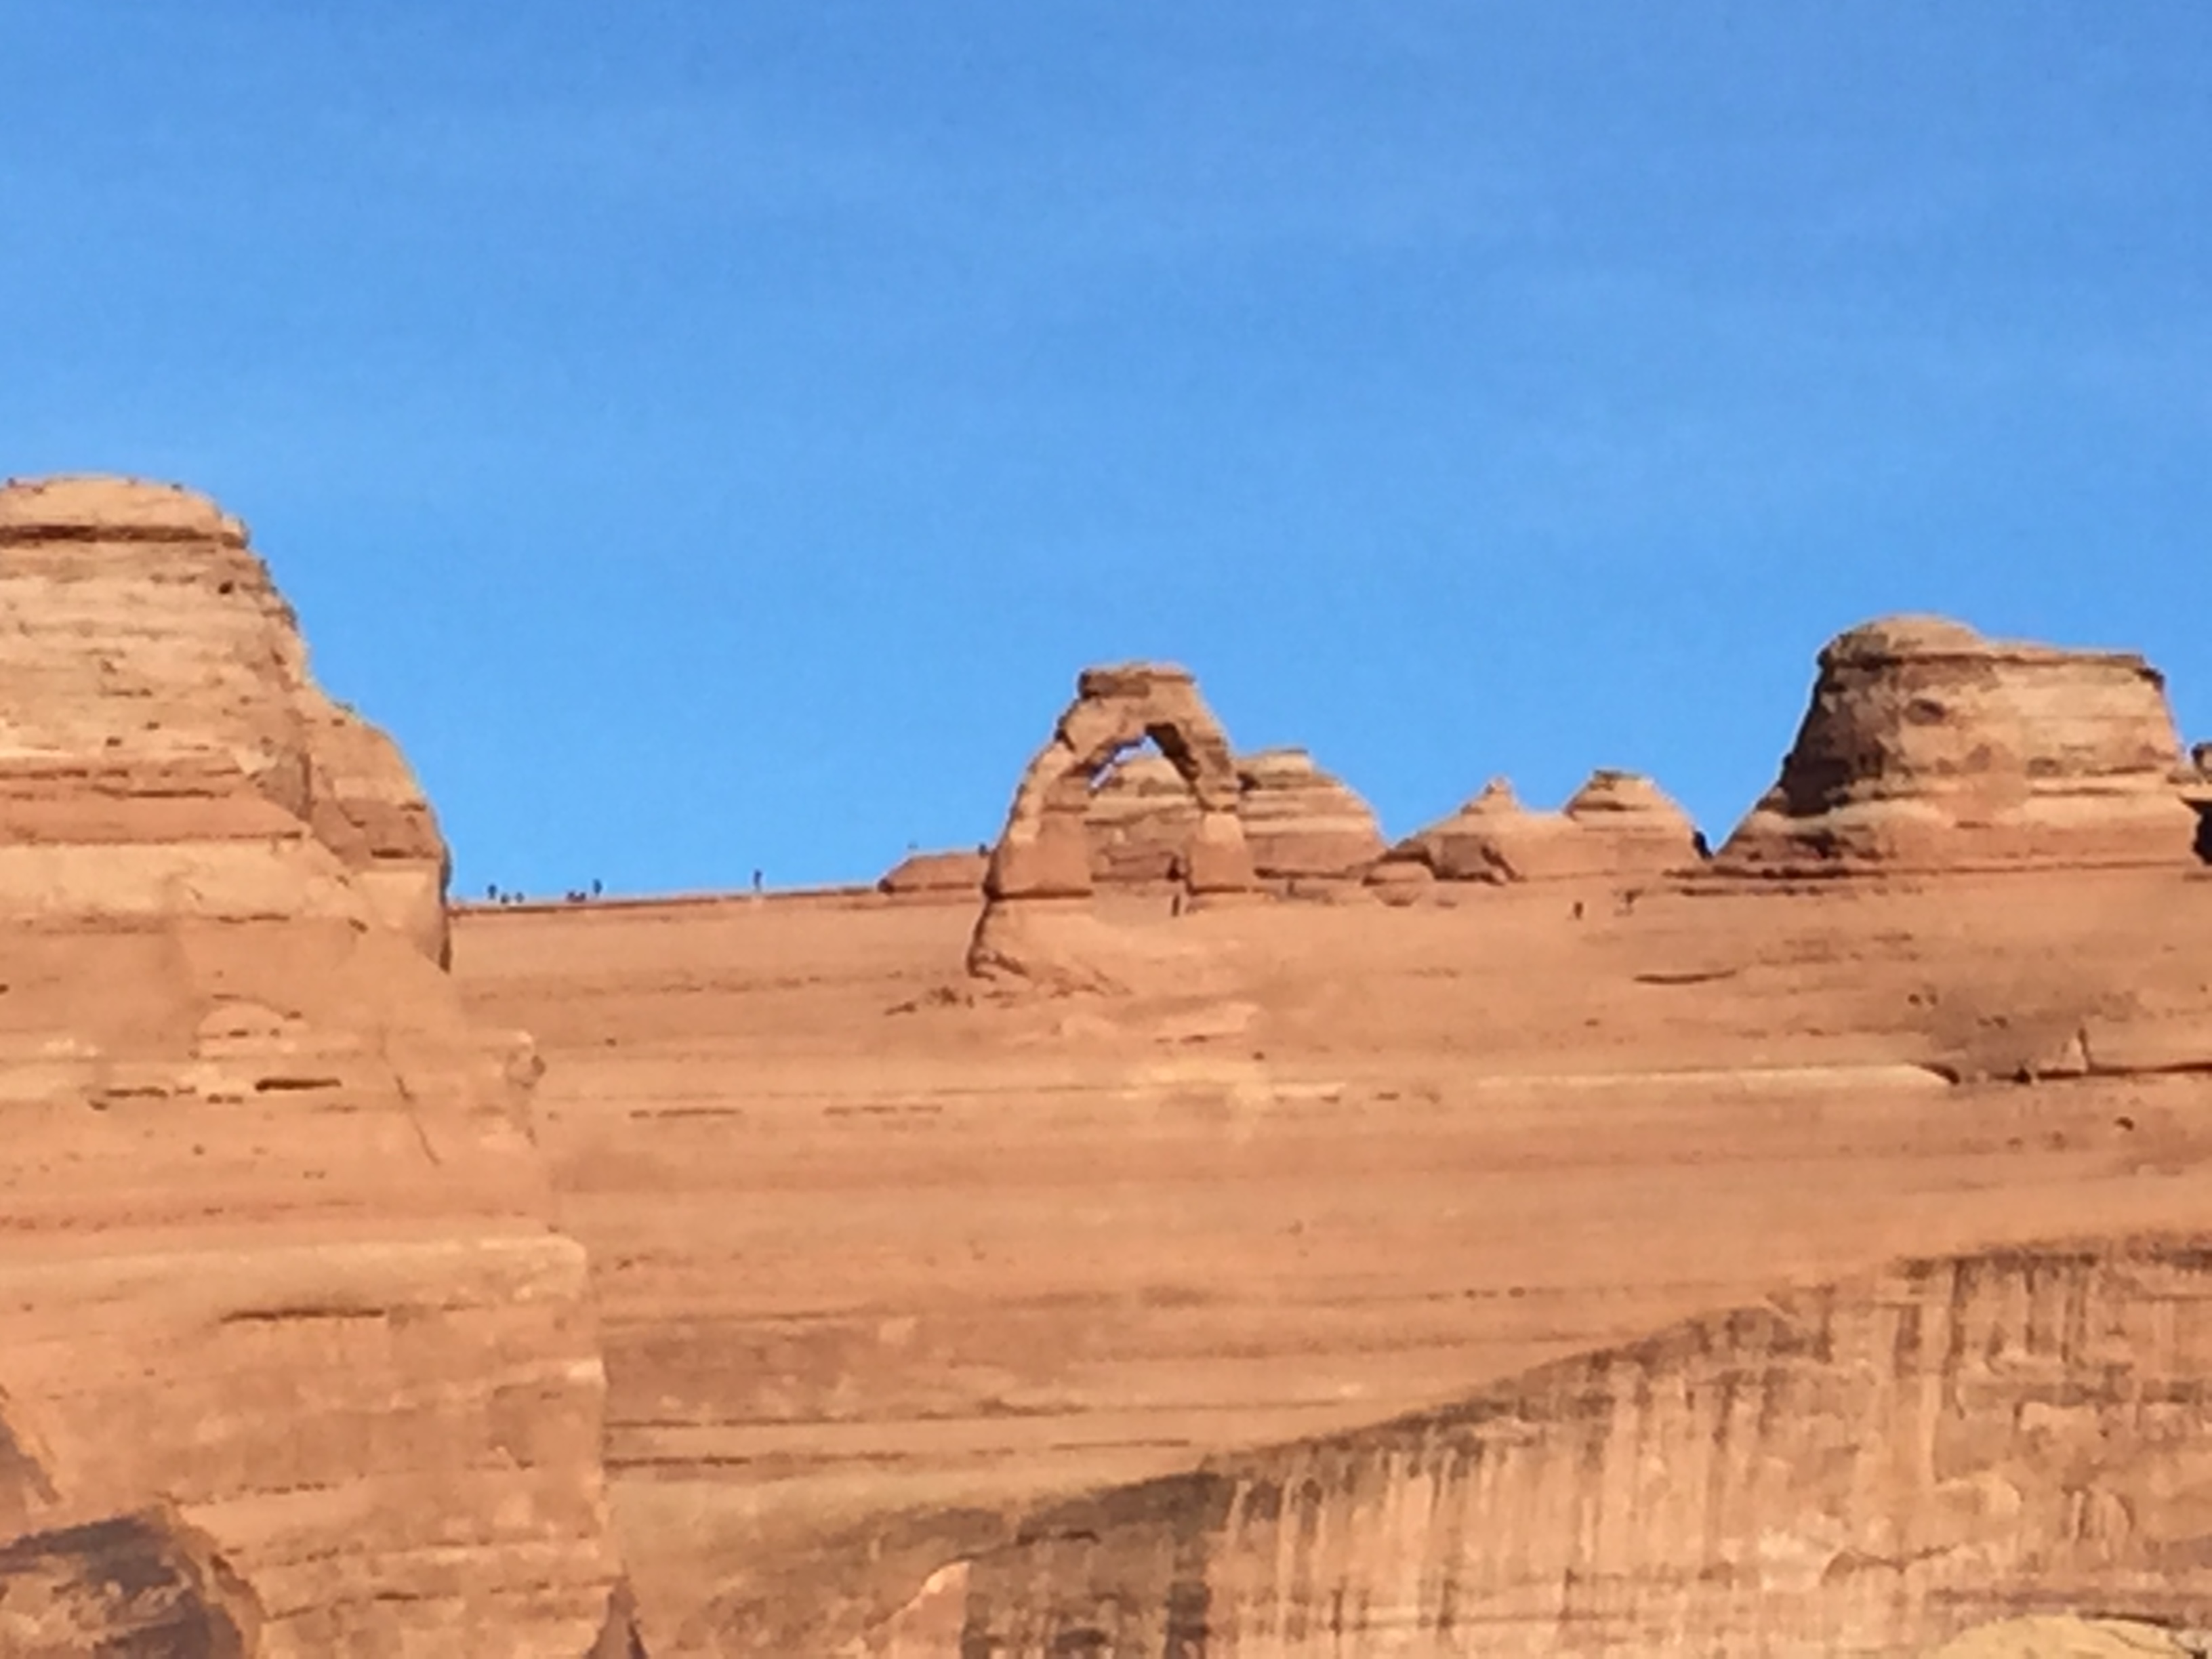
Delicate Arch as seen from the upper overlook which is about a 1 mile hike from the parking area.
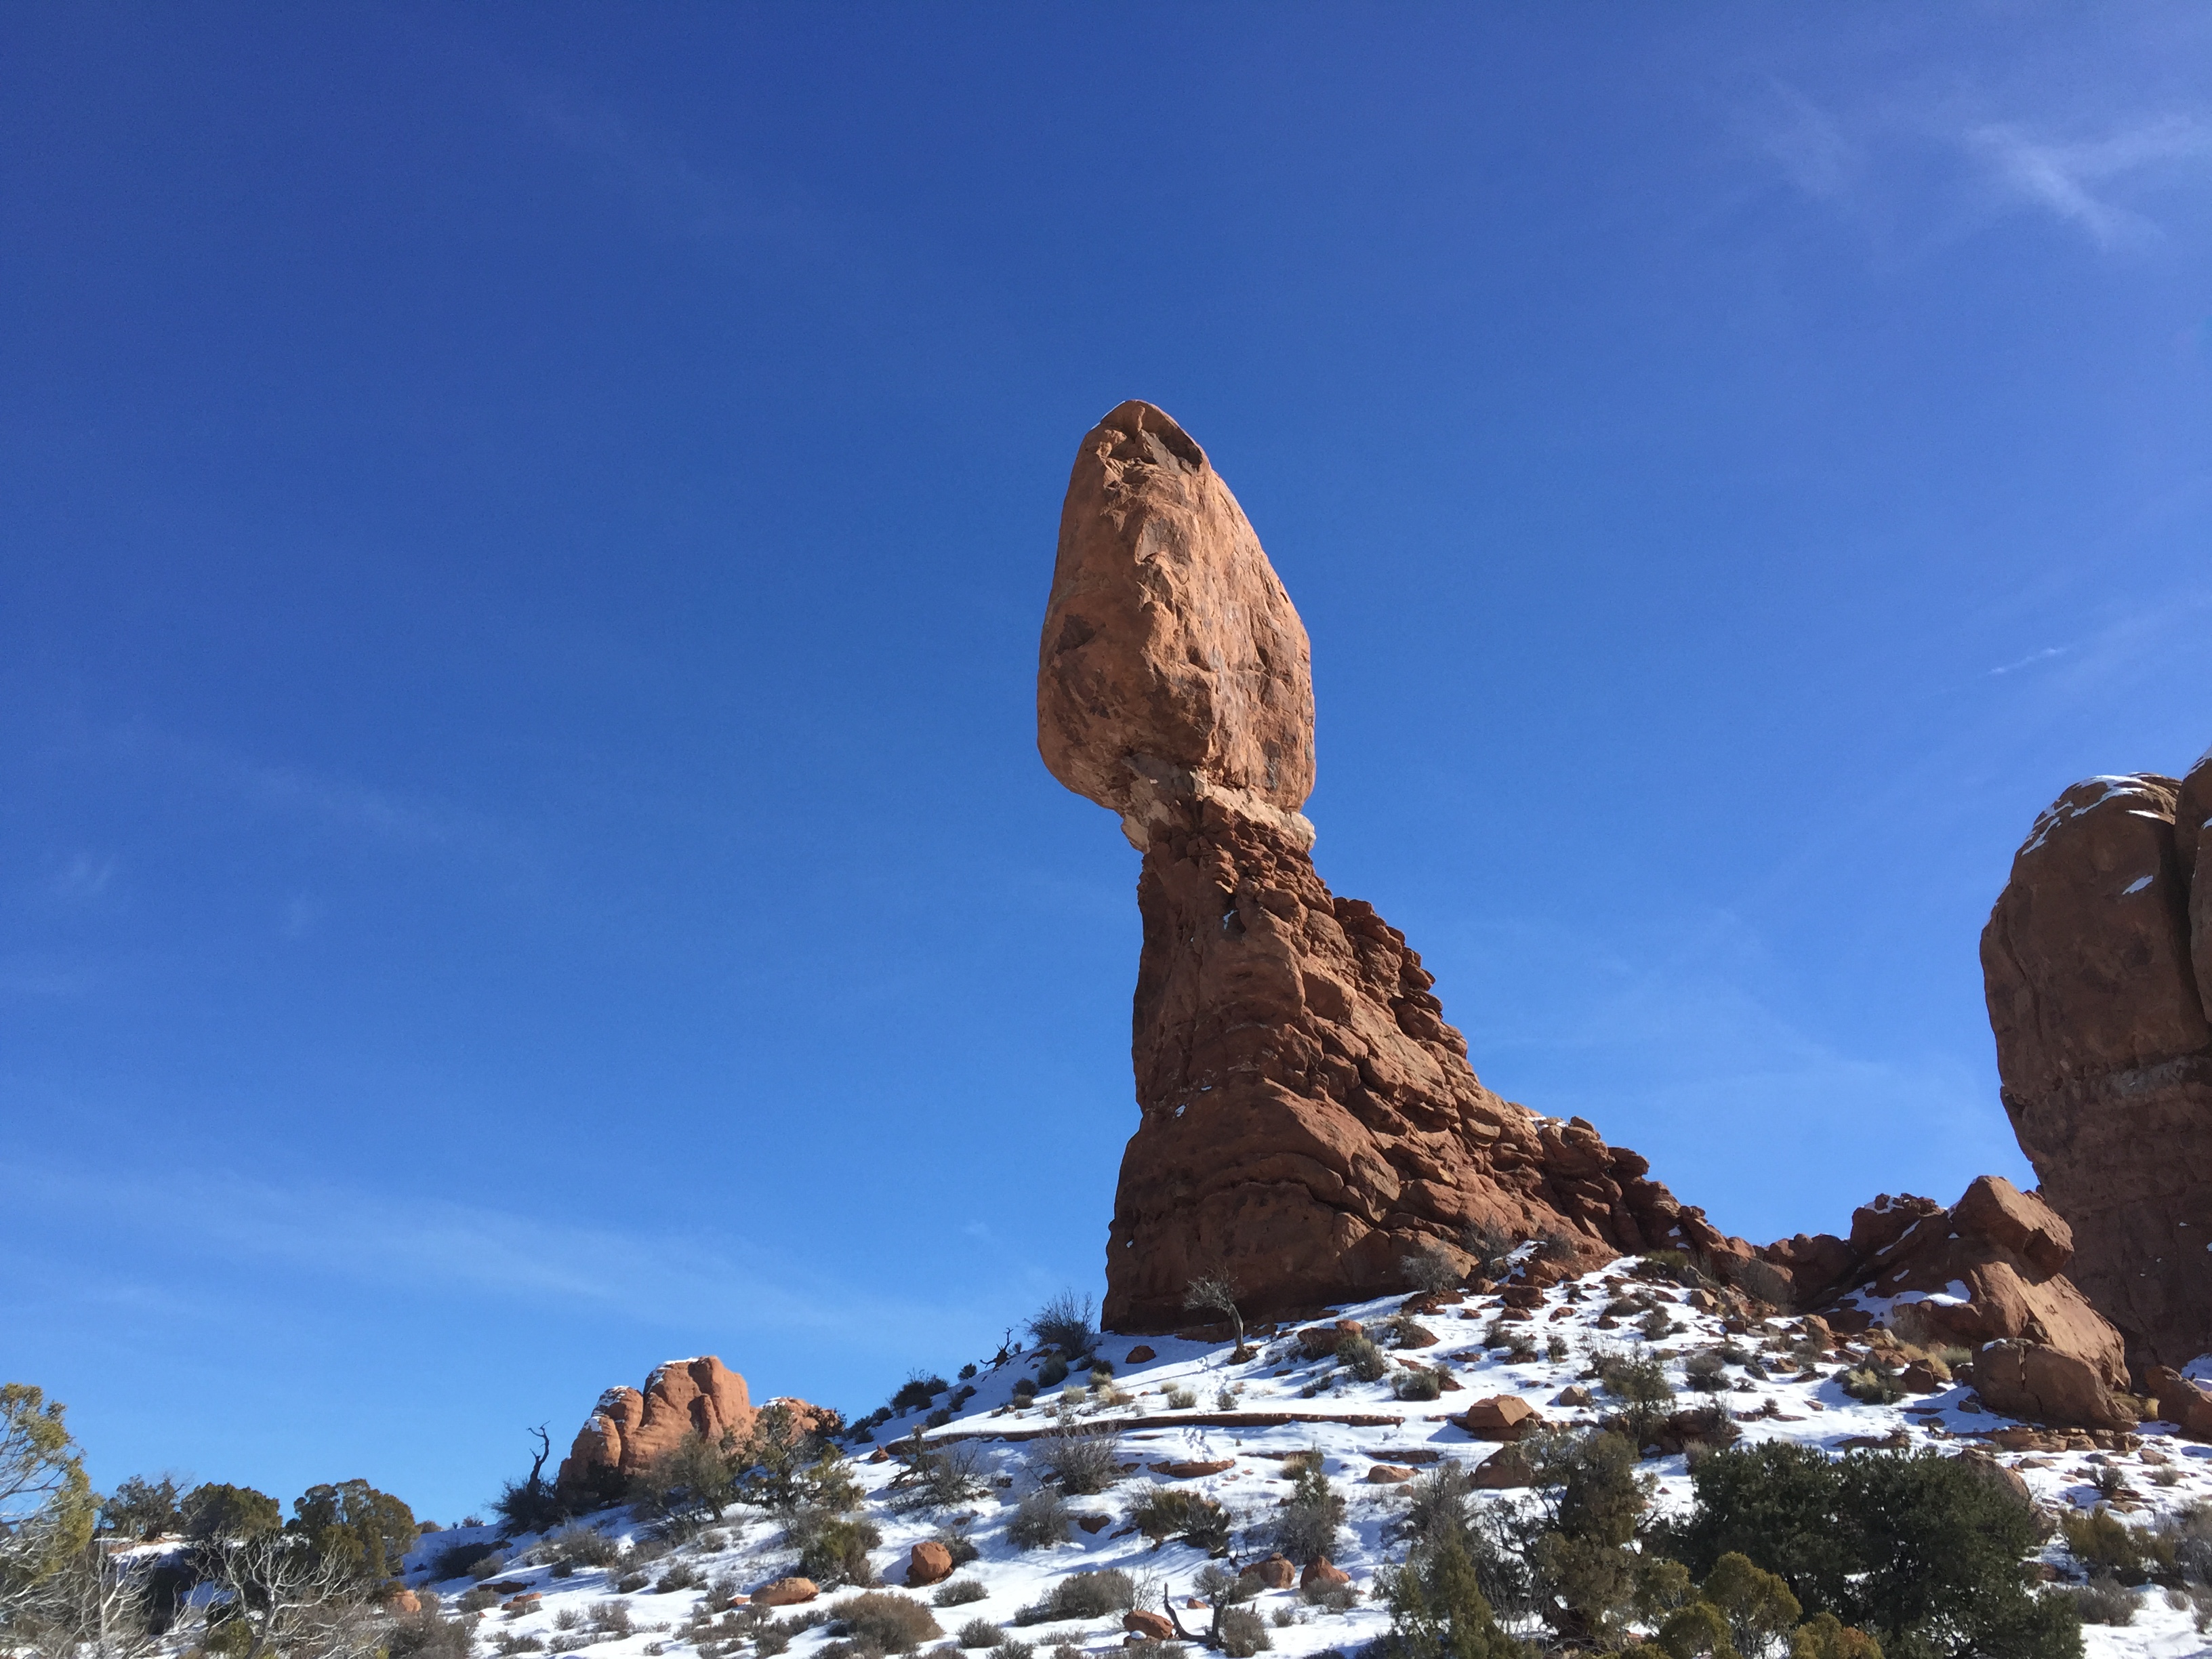
Balanced Rock
All in all Arches National Park was a really fun stop on our trip. The hiking we did was not physically hard or difficult but it did offer some incredible views and the best weather we had our whole trip. There is something to be said for hiking in short sleeves under a brilliant blue sky with snow on the ground! I would certainly put Arches on my list of parks I would like to visit again with more time to do longer hikes.
Categories: National Parks, Utah, Wild West

