
TRIP REPORT: Nippletop, Dial, Colvin, and Blake in One Day – Adirondacks, NY 9-6-15
Hike stats at a glance:
~19 Miles
6,000 ft of elevation gain
4 High Peaks – Nippletop (4,610), Dial (4,003), Colvin (4,081) and Blake (3,970)
10 hours total time
~80 degrees and sunny
I will apologize for my outrageously long post in advance, but a long day calls for a long post and I do not want to leave anything out that may be beneficial if you are planning a similar trip. The four high peaks of Nippletop, Dial, Blake and Colvin are often but not always climbed as a one day trip. However, if you are up for a challenge it is certainly doable. For any of you who read my posts regularly you know I hate splitting up peaks that can be done all at once, so for me the order of the day was to do all four. Even though the mileage is pretty hefty at 19 miles roundtrip, it is the elevation gain of nearly 6,000 ft which makes this hike a more challenging endeavor. To put it in perspective, this is similar to the elevation gain you will encounter climbing Mt Whitney (14,505ft) in a single day, albeit without the issues associated with high altitude!
Since it was a holiday weekend I did not even try to find a hotel or campsite for the night so instead I parked in the St Hubert’s parking area closest to the trail head at the Ausable Club off of Ausable Club Road, and spent the night in my trusty vehicle. Since the trailhead is technically on private property, hikers are required to park in this lot before hiking about one mile to the actual trail head. This can be a bit of a drag but unfortunately there is really no other option. Unless of course you would like to join the Ausable Club.
I arrived at the parking lot at about 11pm on Saturday night and it was still quite full and busy, with people coming and going throughout the night. I slept well enough but you would think by now I would have invested in some ear plugs but alas I seem to lack the ability to plan that well and was conveniently awoken at about 5:30am by the sounds of zealous hikers setting off for the day. Knowing that anymore sleep was not going to happen I got packed up and ready to go and hit the trail at about a quarter to 6.
As I mentioned above the first mile consists of hiking through the Ausable Club along the road but it goes by quickly and serves as a decent warm up.

I don’t play golf but I imagine this course would be quite tough, it certainly has beautiful scenery as well!
After a quick shuffle down the road you will make it to the end and see the trailhead register right before the start of the dirt road. I signed in at just about 6am on the dot and officially began my day. You will walk past a big wooden gate which will let you know you are headed in the right direction.

Gate on Lake Rd.
The next section of hiking is still on a dirt road but it follows the brook for most of the way to the next junction and isn’t so bad. You will see many other trails on the right side leading towards locations in the great range if you stay on the road. This is also a popular way for many people to hike up Gothics and early in the morning I passed a few people who were headed that direction.

The pleasant dirt road you will spend a few miles hiking on at the start and end of the day.
After only a short ways I came to the first trail junction on the left which heads towards Bear Den Mountain, Dial, and Nippletop. After deciding I would rather save the longer hike on the road for the end of the day, I made the turn and headed into the woods.

Start of the Henry Goddard Leach Trail
The HGL trail is well marked, and is generally in good shape. There was no mud on this particular day (although I do not think it is particularly prone to it) and it was easy to keep a good steady pace. The first couple of miles on the trail is not terribly interesting from a scenery perspective but it does rise quite sharply which makes for a pretty grueling start to the day. The trail does not really let up and maintains a pretty constant steep grade.

Heading up the HGL trail
As you make your way up the HGL trail towards the top of the Noonmark Shoulder you will begin to encounter more rock formations and small slabs that will be familiar to anyone who hikes regularly in the high peaks. It is also at this point that the terrain begins to be much more interesting and fun to look at.

Small slabs begin to appear as you get higher up before reaching the Noonmark Shoulder.
Once you near the top of the Noonmark Shoulder you will also encounter a pretty unique grove of trees to hike through which up until now I do not think I have ever encountered in the High Peaks, certainly not in such a high concentration anyway. I would really love to know what these are if anyone knows. I really found them to be a beautiful element on the hike.

I would love to know what kind of trees these are if anyone is familiar!

In my opinion they created a pretty unique High Peaks hiking experience.
Once you reach the top of the Noonmark shoulder you will come to a small open rock slab which includes some pretty nice views of the nearby Great Range. There is also a trail junction sign near the top which will let you know that you have arrived at the top.

Trail junction sign marking the top of the Noonmark Shoulder just before opening up onto the exposed slab.

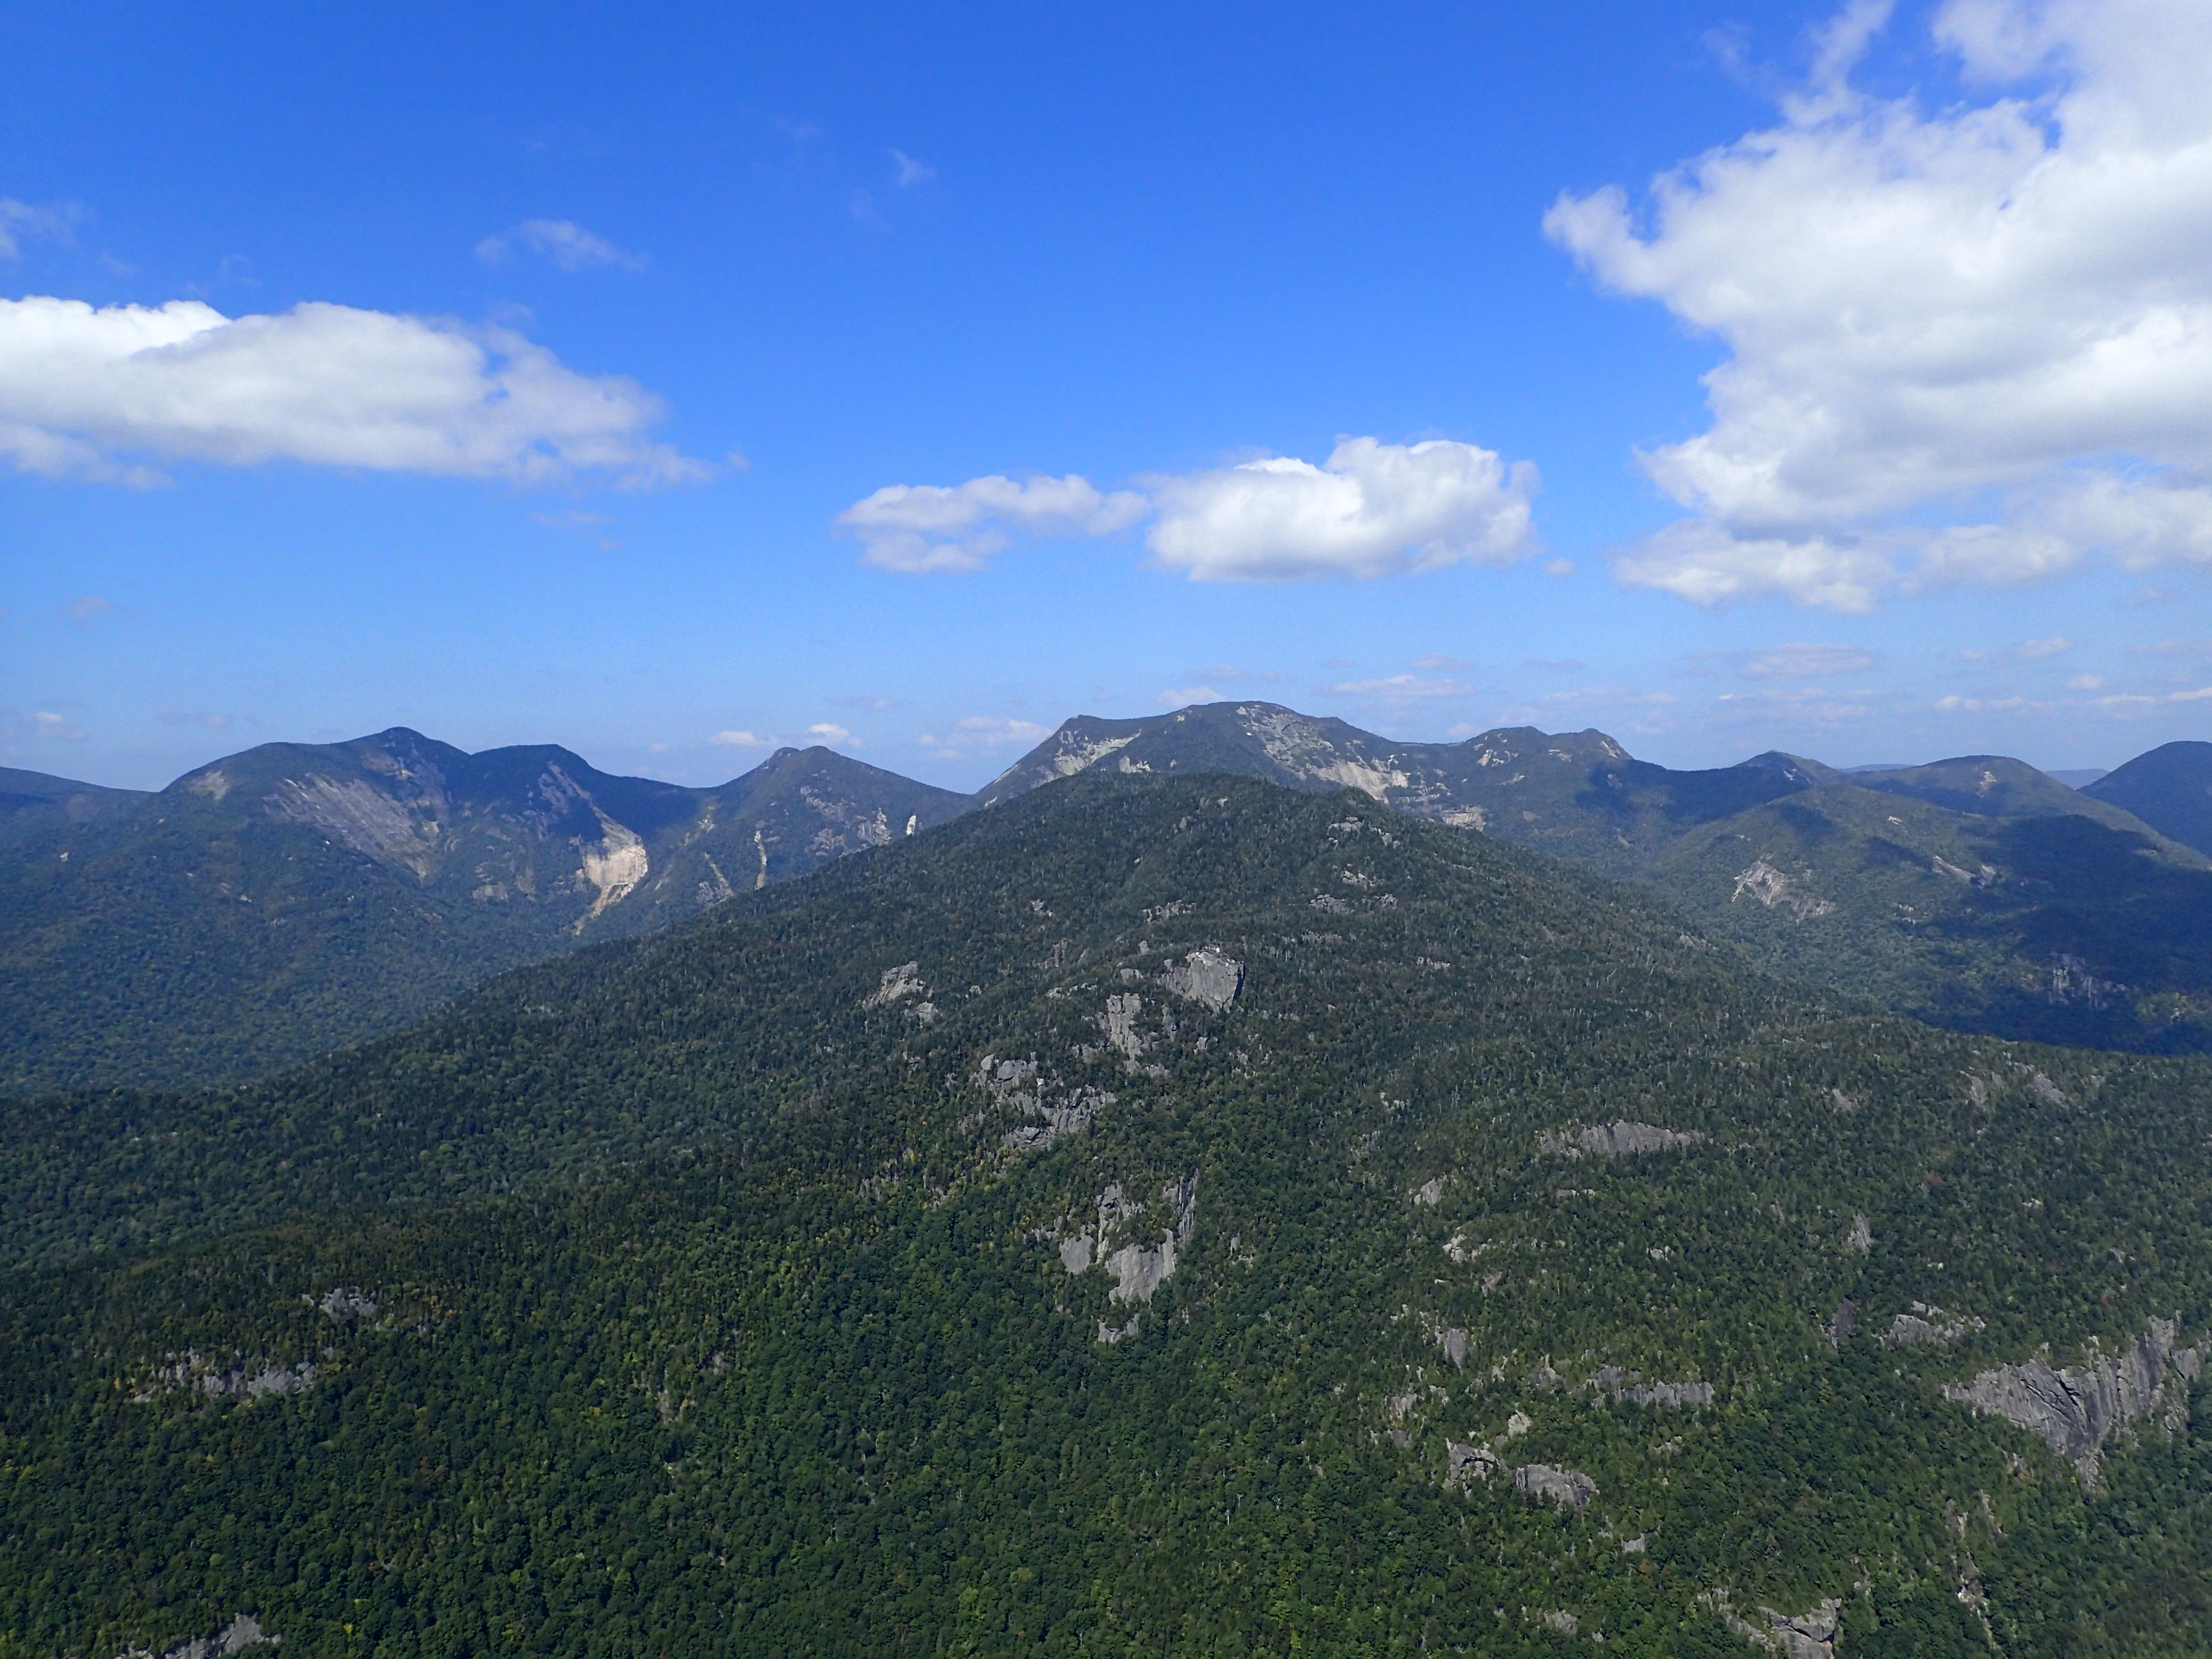
Views from the Noonmark Shoulder

Views from the Noonmark Shoulder
I only stayed for a few minutes to enjoy the view before making my way on to Bear Den Mountain. At first I thought I may have made a wrong turn because the trail dips sharply back down hill and back in the direction you had just come but rest assured this is the correct way to go! This next section is pretty uneventful and just consists of going down the side of the Noonmark Shoulder and back up the side of Bear Den Mountain.
Bear Den Mountain is really pretty uneventful and besides passing by a few interesting rock outcroppings the only way you would realize you are at the summit is because of the next trail junction sign marking the distance from there to the summit of Dial mountain.

The beautiful summit of Bear Den Mountain

Trail junction sign at the summit of Bear Den.
The next 1.3 miles to the summit of Dial Mt. is pretty standard Adirondack High Peak hiking and was not particularly interesting or difficult, but always beautiful!

Trail leading to Dial Mt.
In no time at all I made it to the mostly wooded summit of Dial Mt. At the summit there is a small opening on top of an outcropping which does offer some nice views of the Great Range similar to what you are able to see from the top of the Noonmark Shoulder.

View from Dial Mountain.
I stayed on the summit to enjoy the view for a short while, but knowing I still had a long day ahead of me I didn’t linger to long before moving along. The sign near the summit of Dial points the way to Nippletop and the trail is easy to follow as there is only one direction to go. The next mile or so on the way to Nippletop was pretty easy as there wasn’t much more elevation gain, especially compared to everything I had already hiked up at this point. As you near the top of Nippletop you will come to one more trail junction which marks the final 0.2 mile trail section which leads to the summit.

Trail junction sign marking the final 0.2 miles to the summit of Nippletop.
The last 0.2 miles goes by quickly as it winds its way along the ridge on the way to the summit. Before dropping down for the last time before making the final ascent you get a neat view of the summit of Nippletop’s unique shape.

Summit of Nippletop
The summit of Nippletop is still wooded but it is tall enough that the spruce trees are fairly short and do not block the great views in every direction. There are a few boulders on the summit which offer beautiful views of the surrounding mountains. I made it to the summit at 10am even and decided to take a long break for lunch at this point while I enjoyed the scenery. At this point a few groups came and left the summit while I was there and at this point I knew that the solitude from the early morning hours was over for the busy holiday weekend. Although I did enjoy having plenty of people to talk with throughout the day.

View from the summit of Nippletop

View from the summit of Nippletop

View from the summit of Nippletop
After finishing off my sandwich I made my way back down Nippletop to the previous junction at 0.2 miles at about 10:40am. From here you make a turn down the sharp descent of Elk Pass. This is also the alternate way up to Nippletop and Dial if you chose to walk longer along the road instead of going up the HGL trail. Elk Pass descends pretty sharply and I do think the gentle upward slope of the HGL trail is a better option for ascending. My thoughts were confirmed by the faces of people I passed on my way down that seemed less than thrilled by making such a steep upward climb. Either way the trail was fun to descend and I made it down to the base of the pass fairly quickly.

Junction sign at the 0.2 mile junction pointing the way to Elk Pass
You will know when you reach the base of the pass because you will be greeted by several beautiful ponds that were created by beaver dams in the area. This area around the ponds is slightly muddy but on this particular day it was nothing outside of what would be expected.

One of the beaver ponds you pass. Busy beavers indeed!
I came to the next junction leading to my next two peaks, Colvin and Blake shortly after crossing over the low lying land where the beaver ponds were located.

Next junction leading the way up to Colvin and Blake
From this point it is only about 2.4 miles to Blake (the further of the two peaks) one way, which means a 4.8 mile round trip from this junction for the two. This is also the junction you will take to return to the St Huberts parking area, so if you are not feeling up to doing all four you can wait until you reach this point to make your final decision. I would only note that Colvin and Blake in my opinion are much more challenging due to the fact that they are quite steep and you need to climb up and over Colvin twice as there is only one trail in and back from Blake. This is not terribly unusual but Colvin is unfortunately steep on both sides. It is perfectly doable but this is just information I would keep in mind so that you do not make your decision based solely on the mileage.
Once turning onto the Colvin trail things got steep immediately and did not let up until reaching the summit. The trail involved a good bit of scrambling and hiking up slabs which made for a very fun and physically challenging ascent. I kept my usual steady pace and worked my way up without too much difficulty.

Trail heading up Colvin

There are many steep sections along the way.

Including stone slabs you need to scramble up.

Suns rays peaking through the vegetation.
The distance from the trail junction to the summit of Colvin is only 1 mile but being as steep as it is felt slightly longer and after already doing two high peaks I was certainly feeling it in the heat of the day. Although I did still feel strong and was able to make good time to the summit. Once you reach the summit you will see another trail junction sign marking the way to Blake Peak in addition to a small clearing leading up to the summit rocks which offer some great views. Mount Colvin is a wooded summit but from the viewpoint on top of the rocks you can get some really awesome views of Lower Ausable Lake and Indian Head below thanks to Colvins excellent position in the area.

Trail junction marking the way to Blake Peak and the summit of Mt Colvin.
View of the Great Range from Mt Colvin

Looking towards Upper Ausable Lake

Lower Ausable Lake and Indian head in the distance.
The small summit was pretty crowded but that was to be expected for such a beautiful day on a holiday weekend. I stayed long enough for the prime real estate near the edge of the rocks, past the trees to open up so I could take my photos, before heading back on the trail. Many of the people I saw were stopping on Colvin for the day but I knew I still had one more peak to go. I would also note here that if you have zero interest in climbing all 46 high peaks there is no real reason to continue on to Blake Peak. It is completely in the trees and the summit is no more interesting than the one on Bear Den. On top of the lack of any view whatsoever, the trail is quite steep and demanding to hike, especially at the end of a long day.
From the summit of Colvin you are looking at 1.4 miles to the summit of Blake Peak and if you were confused by how I felt about this peak I will mention again that this was definitely one of my top 3 least favorite High Peaks to hike. This leg of the trail starts off pleasantly enough as it traverses the flatter top of Mt Colvin before making its way sharply down into a col between Blake and Colvin. It is at this point of sharp decline that you get your first glimpse of Blake Peaks woody summit mocking you in the distance.

Blake Peak as seen from Mt Colvin
As you make your way down the side of Colvin you will also encounter a pair of ladders which will help you make your way down the steep sections.

One of the two ladders you will encounter descending and later ascending Mt Colvin.
Once you make it to the bottom of the col between Blake and Colvin you will come to another trail junction which will point you in the direction of the last 0.5 miles to the summit.

Trail junction leading to the summit of Blake Peak

The trail starts on the other side of this fallen log.
The ascent up Blake at this point is only 0.5 miles but it is very steep right from the start and does not really let up until you get to the top of the peak. There are plenty of sections of exposed rock to scramble up and despite the distance it could take a fair amount of time to slowly make your way up.

Trail leading up Blake Peak

Another slab leading up Blake Peak
The peak as I mentioned above has no views from the summit but looking back on the way up you do get a mostly obscured but still nice view.

Obscured view looking back on the way up Blake.
After navigating my way up the steep side of Blake I finally made it up to the summit. Once there it would be quite easy to walk past it without even realizing you have made it to the top. Thankfully however, there is a sign marking the trail junction so you know when you have arrived at the top.

Sign near the summit of Blake Peak
There is also a small clearing with a rock you can sit on off the main trail but besides that there is not much else. I reached the summit of Blake Peak at 1:21pm, about 7 and a half hours after I had started hiking.

The summit is off to the right where you see the trekking pole.
At this point I have to admit I was starting to feel a bit tired and decided to stop for a snack before heading back out the way I had come. The hike back down Blake and over Colvin was a bit soul sucking but otherwise uneventful. It took me about the same amount of time to hike the distance back to the base of Colvin as it did to hike to Blake and by this point I was low on water which did not help much in the heat. I also stopped briefly on the summit of Colvin to enjoy the views one last time before heading back down towards the parking lot. Once reaching the trail junction at the base of Colvin I started following the signs for the St Huberts parking area and Lake Rd.

Junction at the base of Colvin
The hike back was pretty straight forward and the 1.8 miles back to the road were not very interesting most of the way.I passed one more junction along the way and just continued to follow the trail in the direction of Lake Road.

I kept heading towards Lake Road
At this point though I was pretty much out of water despite having brought 3.5L. I could have finished with what I had left but decided I would stop at the brook for more just in case and it turned out to be a pretty nice stop in any event.

Cairn leading to the brook.
Directly off the trail was a cairn marking a small path to the brook as well as some campsites which I believe were in the area. The brook was very beautiful and the water was crisp and clean. There was even a very interesting cairn!

Kudos to whoever put this beauty together.
After filling up my water bottle and washing the sweat off my face I continued back down the trail. I made quick work of this last section before hitting the road, passing several trail junctions along the way. It is also at this point that you could make a side trip to Indian Head or Fish Hawk Cliffs, but on this particular day I did not make the time for a side trip. However, if you have the time I would certainly recommend checking them out!

Trail junction leading back to the road.
Along the way there was not much else to see before hitting the road, but you are left with a choice of either following the brook a bit further or taking the short cut back to the road. I opted on the shortcut but I hear the scenic route is quite beautiful. I got a glimpse of the brook through the trees but did not stop to get a better look at this point.

View of the brook by the cutoff junction.

Junction leading to the cutoff. The Gill Brook trail is also a viable option as a scenic route.
The cutoff trail is fairly short and in no time I found myself back at the road, with only the last 3 miles of hiking on the road to finish.

Final trail junction at the end of the cutoff.
Once I got to the road I hung a right and made my way back down the last 3 miles to the parking lot. Since I was still feeling pretty good at this point I decided to run the last bit on the smooth road and besides having to watch out for the Ausable Club bus it was a good end to the day. I made it back to the trail register at 4pm, making for a 10 hour total round trip.
All in all the four peaks of Nippletop, Dial, Colvin, and Blake where a fun and rewarding day hike. I was also pleasantly surprised by the views on Colvin, which were much better than I had anticipated them to be. Although Blake was also just about as miserable as I expected. I’m not sure I will be hurrying back to do these soon but they were a good time for sure. I would certainly recommend doing these as a day trip if you can, and even if your not sure if you can, the way they are oriented makes it easy to do two first without committing to all four.
Categories: Adirondack High Peaks Region, Trip Reports


That grove of trees at the burned area on Noonmark are aspens, which is especially surprising, because they don’t appear anywhere else in the area. Click here for one of the articles you’ll find if you do an online search for “aspens AND Noonmark”: http://www.apnmag.com/fall_2009/Kittle_Noonmark.php.
LikeLiked by 1 person
Thank you for the info Bill. I knew there had to be something special to that grove. Thank you very much for filling me in!
LikeLike
For anyone else looking for that page (which now gives a 404 error), another story about the Bear Den Fire in 1999 appeared in the Adirondack Explorer: https://www.adirondackexplorer.org/stories/1999-noonmark-fire-20-years-later
LikeLike
Thank you for your detail report on the 4 peaks in one day. We plan to attempt the hike soon. I feel nervous about it being 19 miles and the hardest hike will be toward the end so that will be challenging.
Fawn
LikeLiked by 1 person